
 |
| 06.07.01 |
I collected a large selection of soluble fabrics from various different suppliers.
Technical Samples
I stitched each fabric with a lace pattern that measured 3cm square, ensuring that all stitching lines connected with each-other.
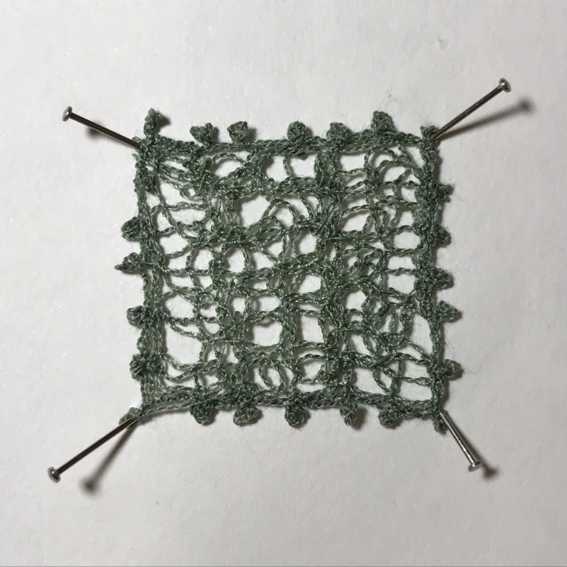
Aquafilm
 |
| 06.07.02 |
Aquafilm is a clear, medium weight cold water soluble stabiliser film.
Being clear, it was easy to trace my design onto, but it was quite weak, and tore when I attempted to stitch in one place for too long.
The film washed out very easily under tepid water.
 |
| 06.07.03 |
The resulting lace didn't loose its shape and retained its original size.
Water Soluble Paper
 |
| 06.07.04 |
Water soluble paper is inkjet printer compatible, and dissolves in cold water.
It was harder to see through the paper to trace off the design, but it is still possible if the original design is drawn boldly, or perhaps traced over a window or lightbox.
The paper took a little longer than the film to wash out. I had to leave it to soak for a while.
 |
| 06.07.05 |
The resulting lace didn't loose its shape and retained its original size.
Solu Fleece
 |
| 06.07.06 |
Also known as Aquasol and Soluvlies. It is a creamy/white non-woven stabiliser that is cold water soluble.
This had a fabric-like, gentle quality that was a pleasure to stitch. It also held up to more layers of stitching in one place. Transfer of design is a little more difficult. You either need a bold drawing, or a lightbox like the paper, but also, its not quite as easy to draw on the fabric as it is the paper or the film.
The fabric washed out very easily under tepid water.
 |
| 06.07.07 |
The resulting lace didn't loose its shape and retained its original size.
Sulky Solvy
 |
| 06.07.08 |
Sulky Solvy is a clear, medium weight, water-soluble plastic film with a light texture on one side.
Like the aquafilm, it is very easy to trace a design onto. It seemed a little less brittle than the Aquafilm and didn't tear so easily when stitching heavily.
The film washed out very easily under tepid water.
 |
| 06.07.09 |
The resulting lace didn't loose its shape and retained its original size.
Thermogauze
 |
| 06.07.10 |
Thermogauze is a creamy/white woven muslin type fabric with a firm handle. It is melted away with a domestic iron.
It wasn't easy to draw with a pen on the woven textured surface of the fabric, although as it has quite an open weave, it is not too difficult to see through to trace off a design. It was, however, a pleasure to stitch into and didn't seem to mind how many layers of stitching I attempted.
It took quite a while under a hot iron for the muslin fibres to disintegrate. They eventually seemed to discolour and then crumble away. I really liked the effect when the guaze had not quite completely disintegrated.
 |
| 06.07.11 |
As it had been ironed, the lace had a beautifully smooth, soft, even appearance.
 |
| 06.07.12 |
The resulting lace didn't loose its shape and retained its original size.
Romeo
 |
| 06.07.13 |
Romeo is a heavy weight water soluble film. Although it is cold water soluble, warmer water will speed up the dissolving time.
The clear film made it very easy to transfer the design. It was also very strong and held up to stitching very well.
 |
| 06.07.14 |
The resulting lace didn't loose its shape and retained its original size.
Avalon
 |
| 06.07.15 |
Avalon is a clear, lightweight cold water soluble PVA film with a light texture on one side.
The clear film made it very easy to transfer the design, but it wasn't very strong and split easily when stitched.
The film washed out very easily under tepid water.
 |
| 06.07.16 |
The resulting lace didn't loose its shape and retained its original size.
Heat Dissolvable Trick Film
 |
| 06.07.17 |
Trick film is a clear, lightweight film. It has a rough surface texture on one side which is designed to grip fabric to prevent it from slipping when sewing. It can be torn to remove, or melted away with a domestic iron (over brown paper).
The clear film made it very easy to transfer the design, it was surprisingly strong and held up well to heavy stitching.
The film did not seem to completely dissolve under the hot iron, leaving quite a sticky residue.
 |
| 06.07.18 |
The resulting lace didn't loose its shape and retained its original size.
Samples of Soluble Lace using Different Stitch Methods.
Samples of Soluble Lace using Different Stitch Methods.
I collected together my offcuts of soluble film and saved them in a jar. I believe they can be dissolved into water and painted onto fabric to stiffen. An experiment for another day!
Using a double layer (for more strength) of Aquafilm (as somehow I had acquired a whole roll!), I worked on the next series of samples (4cm square), using the following criteria:
1) 'Normal' stitching
2)Free stitchery using embroidery foot with feed teeth out of action
3)Very open effect
4)Very dense effect
5)Only in one direction
6)In opposite directions
7)In curved shapes
8)Straight stitch
9)Any swing stitch
10)Cable stitch
11)Whip stitch
12)Metallic thread
13)With trapped bits
14)Form a 3d shape
 |
| 06.07.19 |
2+3+7+8
 |
| 06.07.20 |
When the Aquafilm was dissolved I realised that I hadn't quire caught the stitching on all of the edges, so the circular/spiral shape went a little bit wobbly.
 |
| 06.07.21 |
2+5+9
(this image has rotated itself by 90 deg.)
After stitching the perimeter square, I stitched straight lines parallel to each-other and quite close together. I then zig zagged some of these lines together.
 |
| 06.07.22 |
When the aquafilm was dissolved away, the zigzag stitching relaxed and formed lovely loose (but tightly packed) spirals around the threads.
 |
| 06.07.23 |
2+4+6+9
I stitched a horizontal and vertical grid pattern, then overstitched some of the lines, both horizontally and vertically, with zigzag stitch.
 |
| 06.07.24 |
When washed out, the sample held its shape beautifully with the zigzag stitch forming soft loops.
 |
| 06.07.25 |
2+7+8
I stitched quite an open grid pattern, and then stitched dense spirals over some of the lines.
 |
| 06.07.26 |
I love the lacy effect given by some areas being densely stitched, and other areas left quite open.
 |
| 06.07.27 |
2+5+8
I tried a very simple arrangement of straight parallel lines.
 |
| 06.07.28 |
This washed out much better than I thought, but I was very careful to ensure that all stitched lines were connected to the perimeter stitching.
The sample did not hold its shape once the pins were removed from the polystyrene, but was easy to pull pack into shape again if required.
 |
| 06.07.29 |
2+3+6+8
I stitched a very open grid in lots of different directions.
 |
| 06.07.30 |
I can see that I missed connecting some of the stitched lines, but this does not detract from the sample. Whilst most of my samples are considered and controlled, this one has unintended loops and loose threads which gives it a very sketchy quality.
It really does not hold its shape when release from the pins, but it is easy to pull back into shape if required.
 |
| 06.07.31 |
2+6+9
In a variegated thread, I stitched a grid of horizontal and vertical lines, then, with a normal machine foot and the feed teeth raised, I stitched lines of decorative (wavy satin stitch) pattern, in random directions.
 |
| 06.07.32 |
I was happy with the way this sample washed out, it held its shape, was firm but soft, and had quite an open lacy quality.
 |
| 06.07.33 |
2+4+7+11+12
I stitched a grid of horizontal and vertical lines, and then stitched over this with diagonal lines in both directions, forming quite a dense structure.
Using a purple metallic thread in the bobbin, and loosening the bobbin tension, I stitched a vermicelli pattern in whip stitch.
 |
| 06.07.34 |
This sample was quite firm when washed out, and did not loose its shape at all.
 |
| 06.07.35 |
2+7+8+14
I was excited by the earlier 'alternate spiral' pattern, so chose to repeat it in a variegated thread to form a 3d shape.
 |
| 06.07.36 |
this image rotated itself!!! I didn't wash the aquafilm completely out of the above sample, leaving some behind to remain slightly sticky. I then wrapped the sample around a button, and tied until dry and set quite hard when I was able to remove the button, leaving the 3d shape.
 |
| 06.07.37 |
view from underneath the 3d formed shape.
 |
| 06.07.38 |
2+4+7+10
like the whip stitch sample, I stitched a dense grid in vertical, horizontal and diagonal lines. I then wound a thick hand-dyed thread into the bobbin, loosened the bobbin tension, and stitched a cable stitch over the grid.
 |
| 06.07.39 |
Again, this sample did not loose its shape when washed out.
 |
| 06.07.40 |
2+3+6+13
I cut snippets of fabric, plasterers scrim, and silver threads and placed them between two sheets of aquafilm. I then stitche an open grid pattern, horizontally, and vertically, over the snippets.
 |
| 06.07.41 |
Some of the silver threads washed out with the aquafilm. I think, if I wanted to use this method for a future project, I should put a lot more thread snippets into the sample to allow for loosing some when washing out, as there is no way you can ensure that you catch all thread snippets when attempting to stitch quite an open grid.
 |
| 06.07.42 |
2+7+12
Using a purple metallic thread in the needle, and a blue metallic thread in the bobbin, I stitched an open grid, and then a loose pattern spiralling from the outer edges of the perimeter, to the centre of the sample.
 |
| 06.07.43 |
I like the roughly stitched, crunchy, open, lacy effect of the sample. It held its shape quite well when washed out.
All samples retained their 4cm square size when pulled to shape, but the looser, more open samples did not hold their shape when released from the polystyrene.
Soluble Lace Samples Based on Sea and Sky Drawings
 |
| 06.07.44 |
A loose, open grid was worked to hold the spiral stitching. More spirals were added in a darker blue, off-set from the lighter blue stitching.
 |
| 06.07.45 |
 |
| 06.07.46 |
A couple of rows of straight stitch were joined together with a zig zag stitch. Colours were overlaid to resemble the Martin John Fowler painting.
 |
| 06.07.47 |
I think that the perimeter lines that were stitched to originally hold the structure, cut now be snipped away.
 |
| 06.07.48 |
A firm grid structure was heavily overstitched with spiralling blue stitching. Wavy green spiralling lines were then stitched using whip stitch. These lines were echoed again with black whip stitch.
 |
| 06.07.49 |
 |
| 06.07.50 |
Straight lines of green and black stitching were held together with randomly placed lengths of turquoise zig zag stitching.
 |
| 06.07.51 |
 |
| 06.07.52 |
Small black circles of fabric were sandwiched between two layers of aquafilm. A square perimeter box was stitched around the edges, then top and bottom lines were joined up with parallel lines of straight stitching in a blue variegated thread.
 |
| 06.07.53 |
It appears that one of my perimeter lines was not connected!
 |
| 06.07.54 |
 |
| 06.07.55 |
 |
| 06.07.56 |
I built up very tiny circular movements of stitches around the edges of the clouds in a blue variegated thread. I then cable stitched a thicker black thread to form black cloud shapes over the top of this.
 |
| 06.07.57 |
I'm very pleased with the way this held together. It has created a very open, lacy effect, whilst holding the form of the cloud shapes.
 |
| 06.07.58 |
I heavily stitched elongated triangles of blue stitchery, connected only at the top. This was overstitched with a bright green cable stitch in a zig zag formation. This was overstitched again and the triangles held together with more zig zagged rows of black cable stitch.
 |
| 06.07.59 |
 |
| 06.07.60 |
Claude Monet
 |
| 06.07.61 |
cross-hatched lines of straight stitch.
 |
| 06.07.62 |
Vincent Van Gogh
 |
| 06.07.63 |
spiralling cable lines
 |
| 06.07.64 |
sunset photograph
 |
| 06.07.65 |
spiralling lines of straight stitch overstitched with meandering lines of stitchery.
 |
| 06.07.66 |
Gustave Courbet
 |
| 06.07.67 |
spiralling zig zag connecting up small pieces of fabric.
 |
| 06.07.68 |
Claude Monet
 |
| 06.07.69 |
Meandering lines of cable stitched on previously cut fabric.
 |
| 06.07.70 |
Claude Monet
 |
| 06.07.71 |
Meandering lines of zig zag incorporating small pieces of fabric cut from the sample above.
I feel that I've really forced myself to experiment with different types of stitchery onto the dissolvable film. I feel that I have succeeded surprisingly well in reproducing the images that I have been working from, and have consequently discovered some exciting ideas and techniques that might find a place in my final piece.
I am aware that my work can be very tight and controlled, but have found some of the less controllable samples, like those using zig zag stitch, most appealing and exciting.