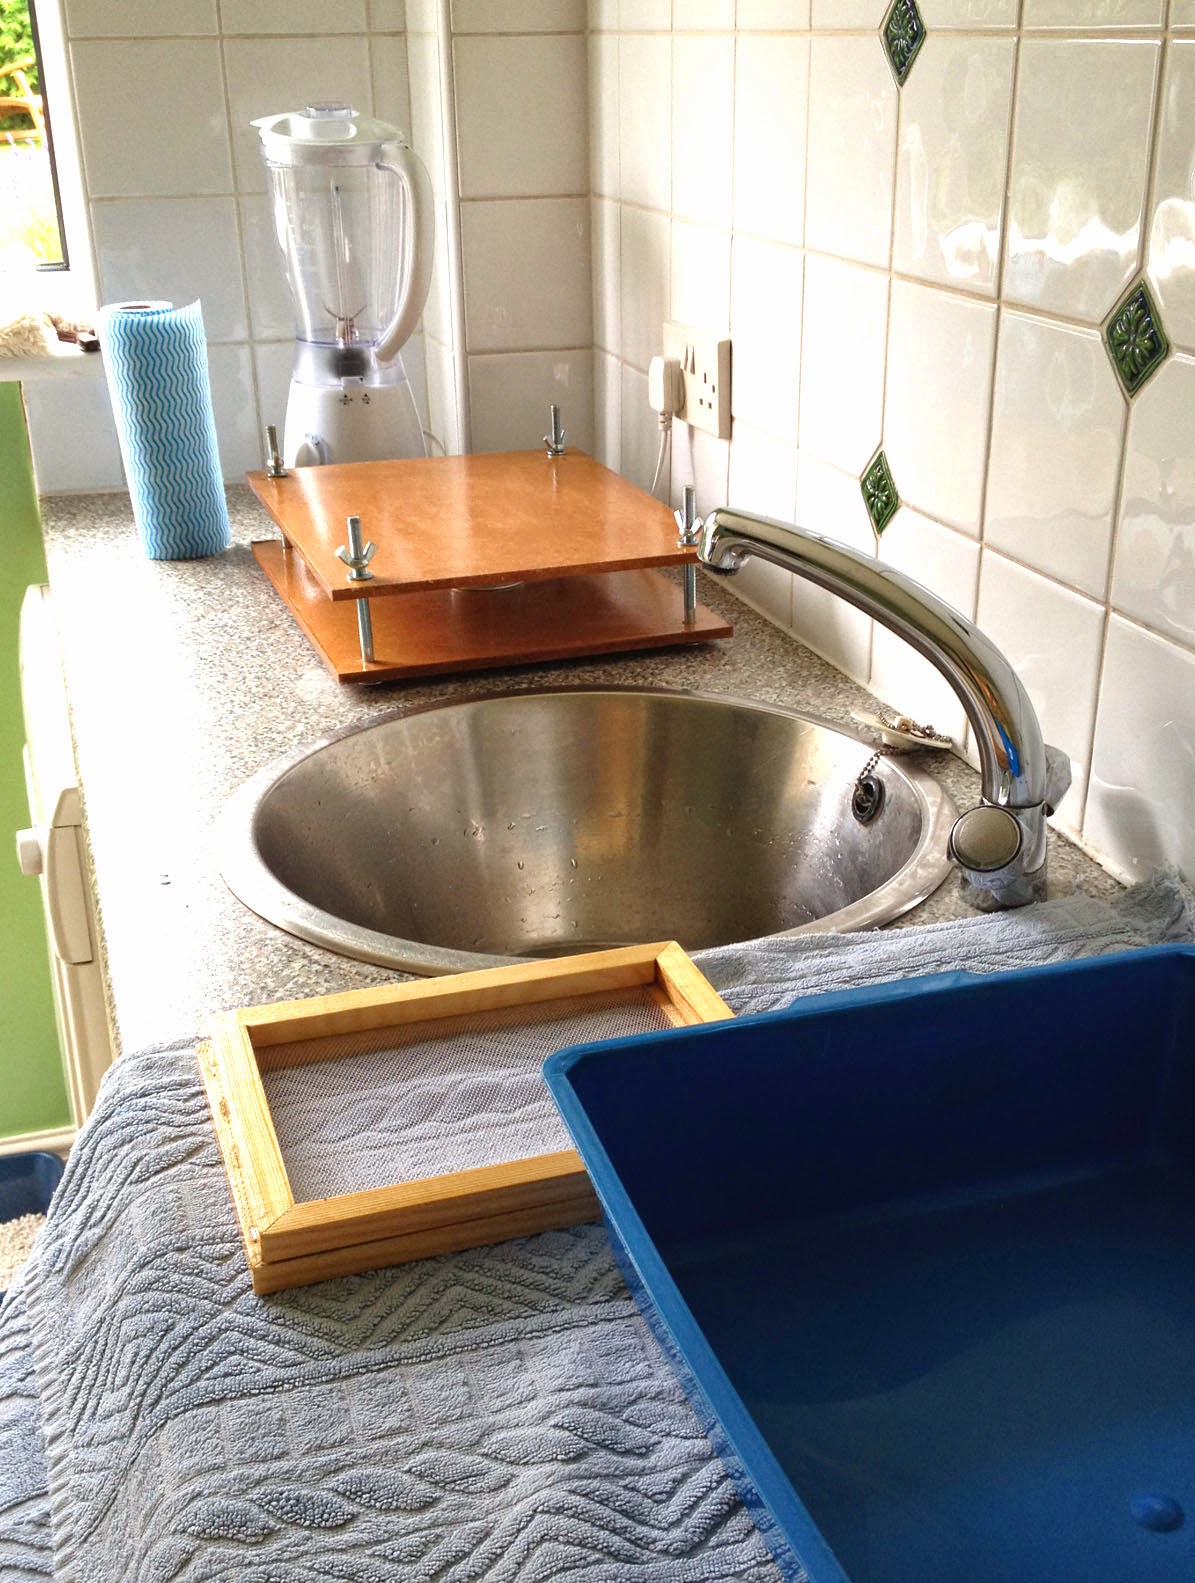
Fortunately I had 'read ahead' and prepared items for this chapter in advance. I bought wood from the local saw mills to make frames/deckle and a press. Luckily, my husband understood my sketches sufficiently to cut and drill the wood for the press make up the frames so that I could get everything varnished in preparation.
 |
| 40401 |
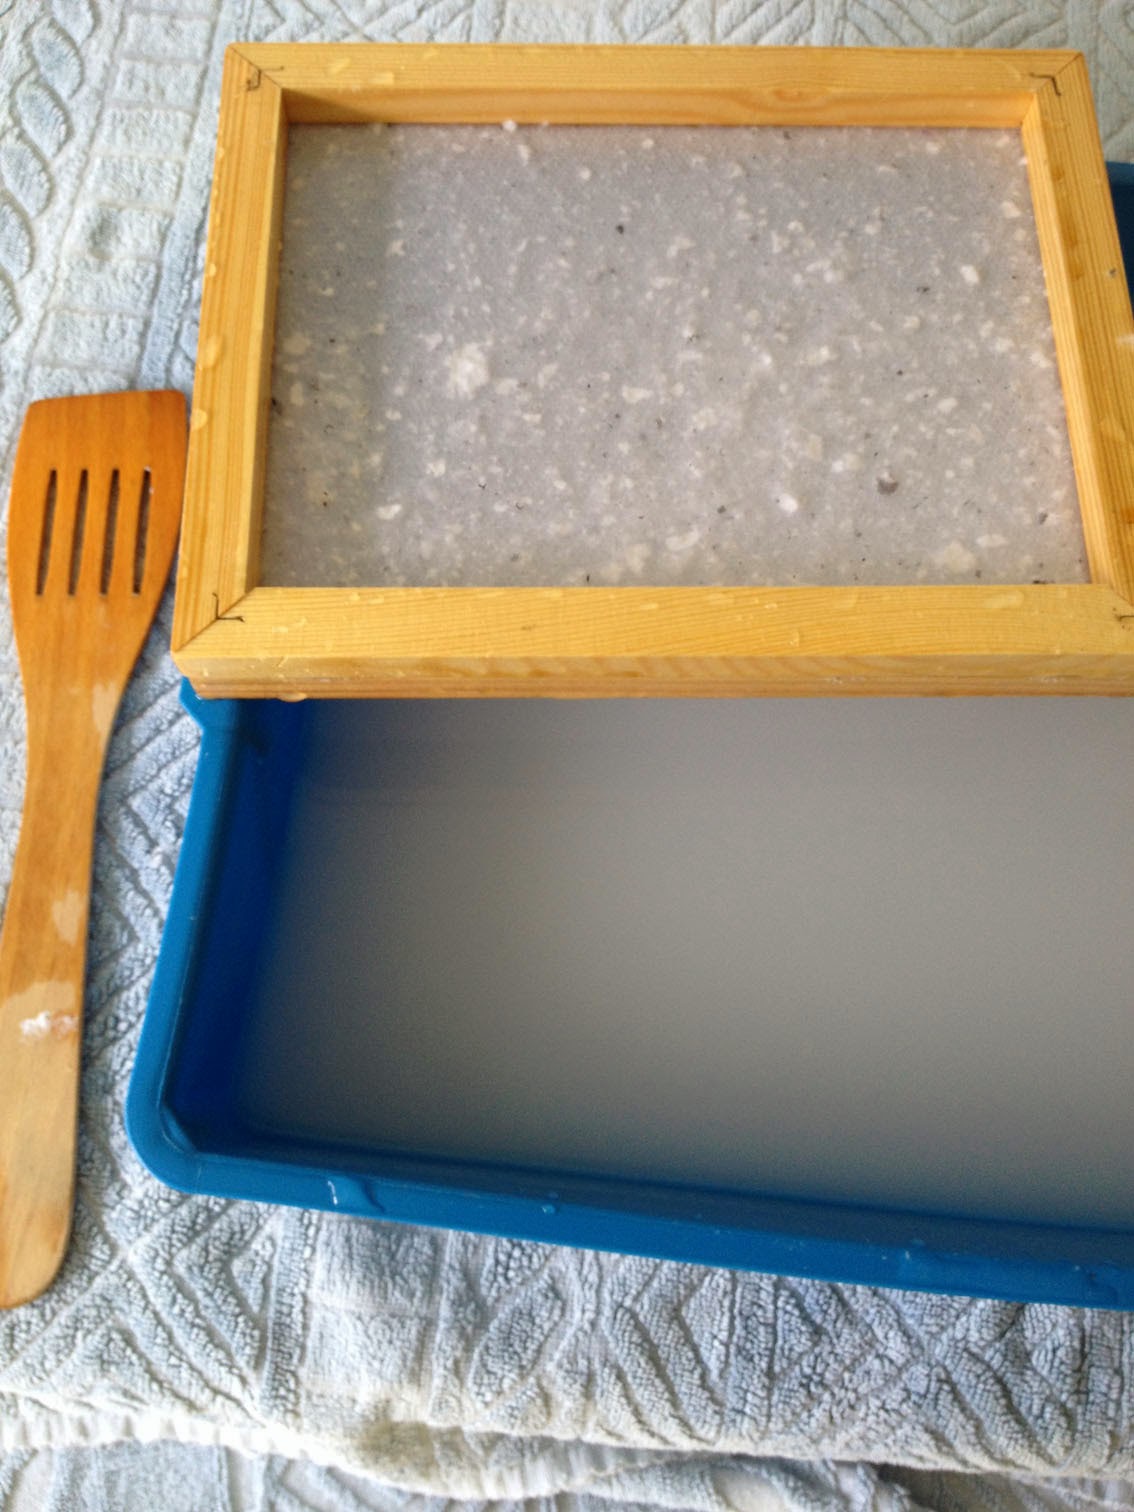
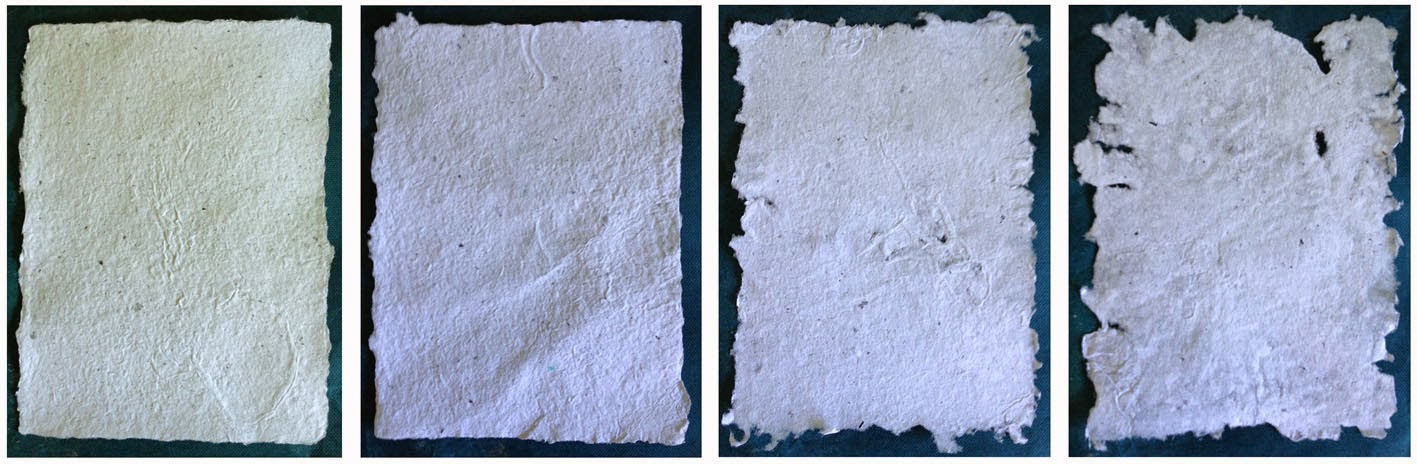
I had also been collecting waste computer paper at work for some time and now have a nice pile of paper ready to be torn into little squares which were soaked overnight to soften. The torn paper was then macerated in the blender a small handful at a time with just under 1 litre of water for 2 short bursts of about 8 seconds each.(I tried 3 x 8 seconds, but felt that the paper was shredded too finely.) Three litres of pulp were added to the vat with another 3 litres of water, then, after agitating the mixture, I dipped the mesh & deckle into the vat & lifeted out my first sheet of paper!!!
 |
| 40402 |
Once drained, this was then 'couched' onto a j-cloth and placed on the press. This was covered with another j-cloth and another piece of paper, and so on until I'd got 4 sheets on the press. This stack of papers interleaved with cloths is called a 'post'. I tightened the clamps on the press for about 30 minutes, squeezing out the water from the paper. Once released, the sheets were seperated and layed out on a table to dry naturally.
 |
| 40403 |
The first 2 were amazing! I was really pleased and surprised.
 |
| 40404 |
The second 2 were very thin. Presumably there was no longer enough paper pulp in the vat, so I blended another 2 handfuls of paper and added them to the vat.
I took 2 days for the thicker sheets of paper to dry. They started off being kept flat on a table in the garage.
I think it would have taken longer, but day 2 was sunny and still, so I hung them out on the washing line. This would be a bad idea on a windy day as they did tend to bend just a little bit.
 |
| 40405 |
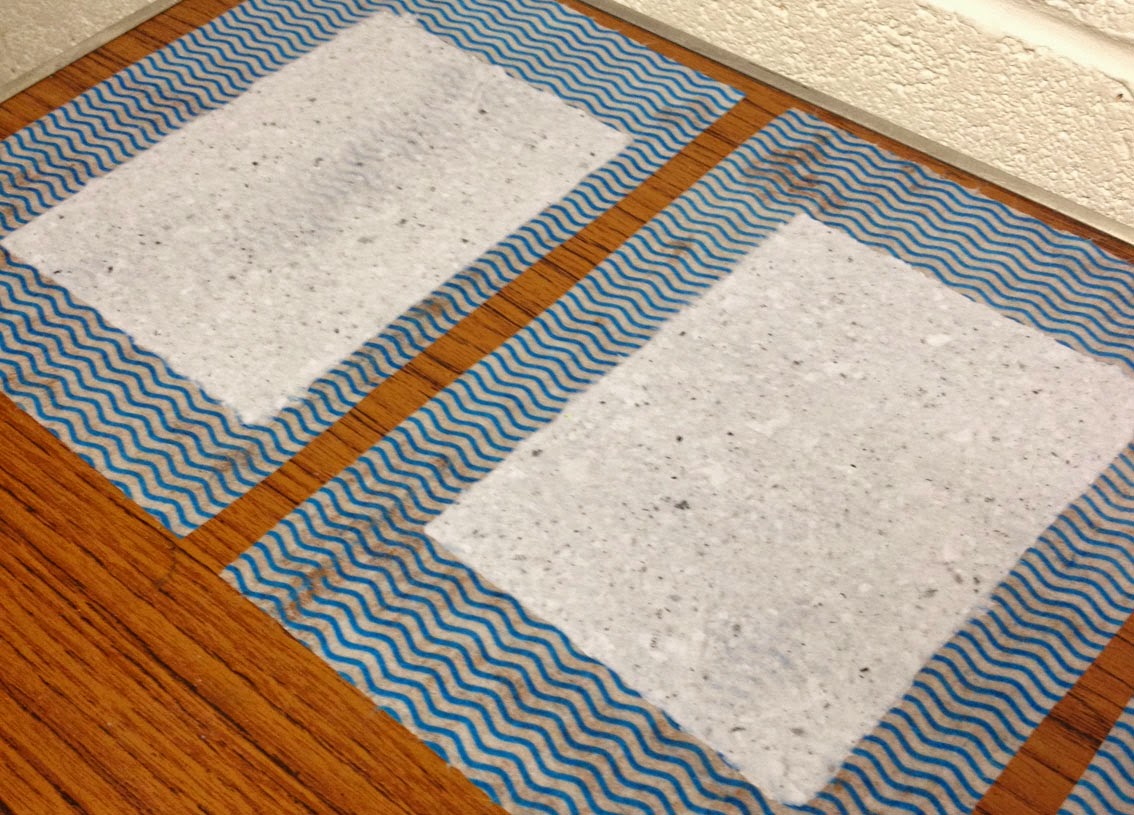
For the first 2 pulls, I used the deckle which gave quite a neat edge to the papers. These 2 turned out quite thick. Almost like card. For the next 2 I tried dipping the mesh without the deckle. As the pulp solution in the vat was getting thinner, so the resulting papers got thinner. The last piece was softer and almost tissue like.
 |
| 40406 |
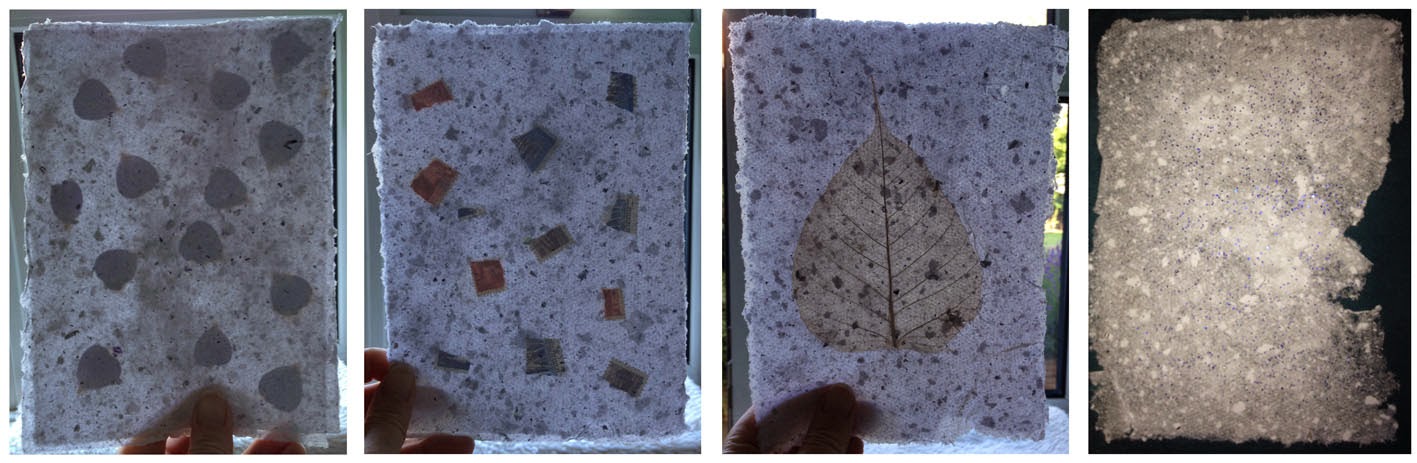
I put some more pulp into the vat. Just a couple of handfuls. I didn't want the pulp too thick as my next experiment was LAMINATING. I made a plain piece of paper as above, then, for the first attempt, I layered some geranium petals on top. I then made another sheet of paper and sanwiched the petals between the two layers. I repeated this with stamps, a skeleton leaf, and glitter. Except for the glitter paper, I think all sheets of paper were too thick for the lamination process. The objects inside the layers can only be seen when held up to the light. Next time I make paper I will try to use less pulp/more water in order to make thinner sheets for lamination.
 |
| 40407 |
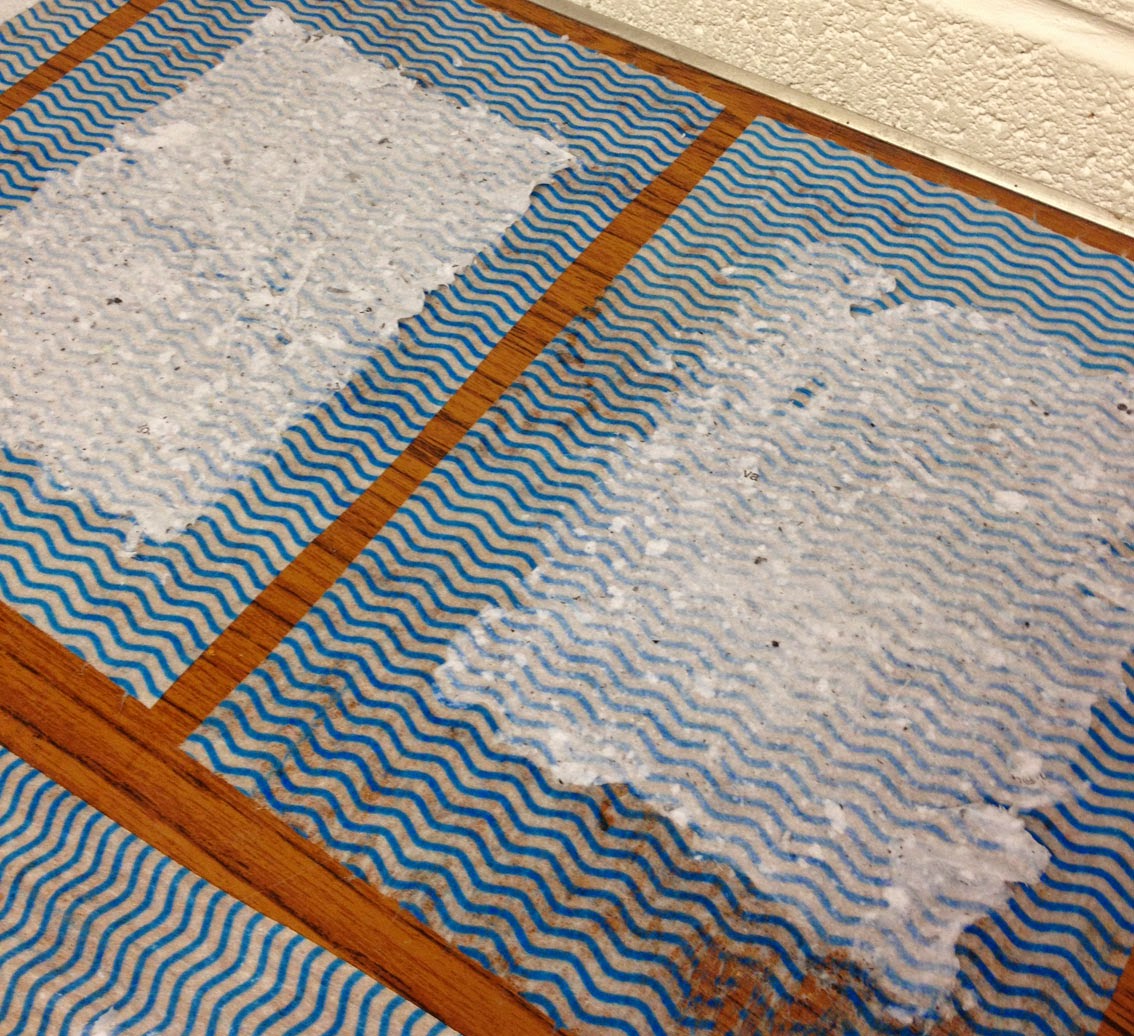
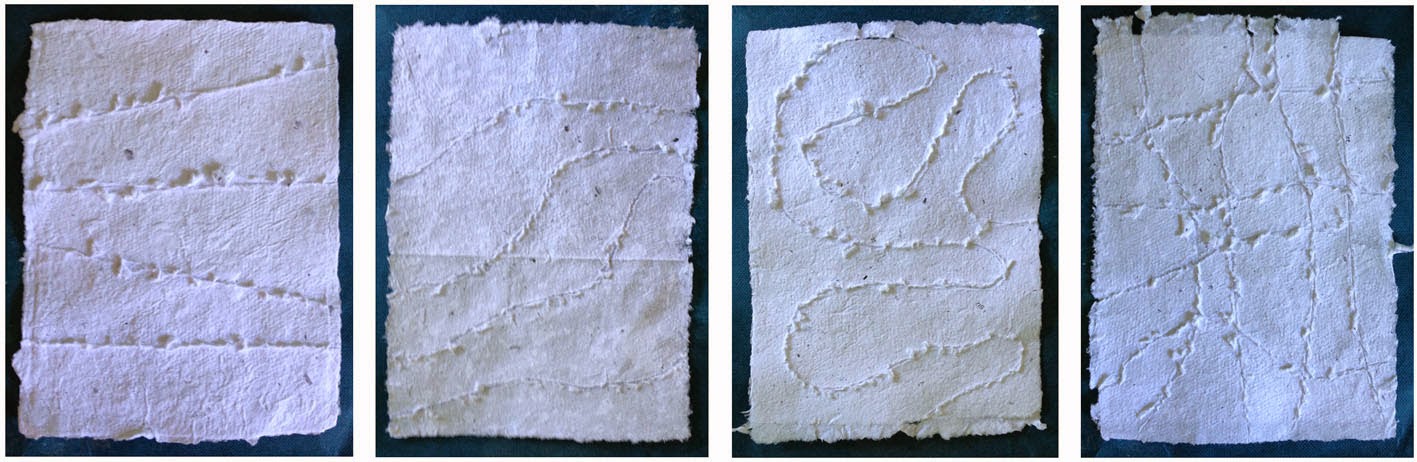
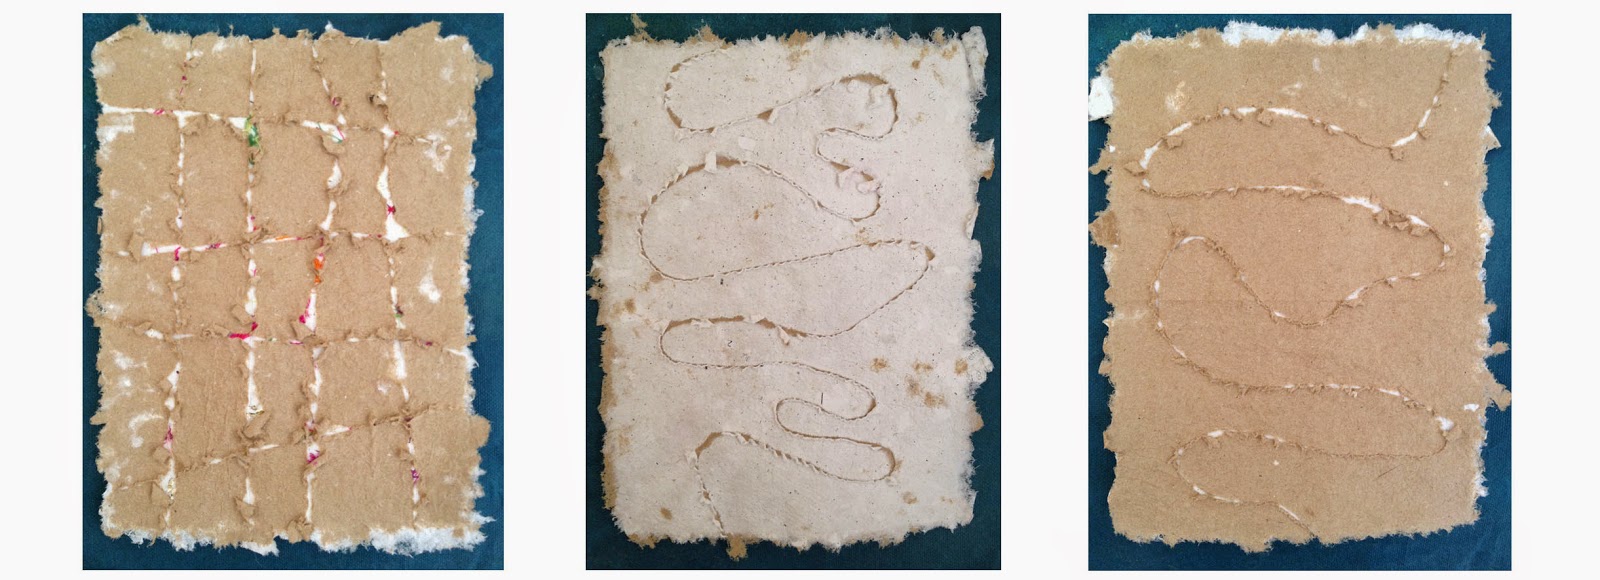
For the third experiment, I added long strips of crochet thread between the layers of paper. When it was nearly dry, I carefully peeled back the thread gently allowing it to rip through the top layer of paper forming irregular ripped lines called FRINGING. The first sample was using straight lines, for the second sample I knotted the cord in various places. The third, I placed the cord in a meandering line, and for the last sample, I criss crossed threads giving a grid effect. I think I got the pulp mixture just right for this method.
 |
| 40408 |
At the start of my next session, I went back to laminating, and put some threads between the layers of paper.
 |
| 40409 |
Then I mixed up a new vat of pulp using recycled manilla envelopes, and tried some more
FRINGING. The first was using a white sheet of paper on the bottom layer and a brown sheet on top, with threads laminated in between, then the cords pulled through the paper to give the fringed effect.
The next sheet of paper was a white layer of paper over a brown layer of paper, the brown layer showing through where the thread is removed.
The third sheet of paper was a brown layer of paper over a white layer of paper, the white layer showing through where the thread is removed.
 |
| 40410 |
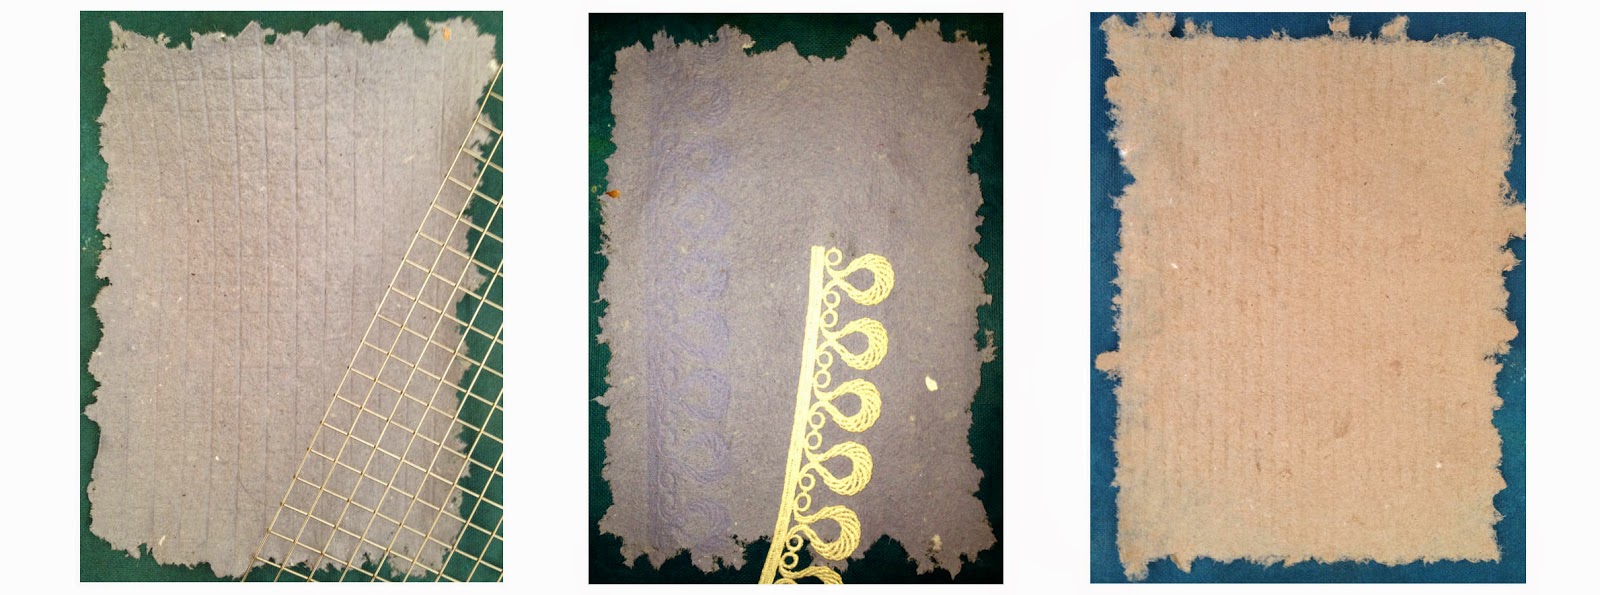
I also mixed a blue pulp vat using shredded paper hand towels from work and tried
EMBOSSING. For the first sample I used a wire mesh over a sheet of blue paper and weighted it down until the paper dried. The next sample used a strip of lace. It is very hard to see, but there is a faint shadow down the left hand side of the paper. The last sample of brown paper was made over corrugated card.
 |
| 40411 |
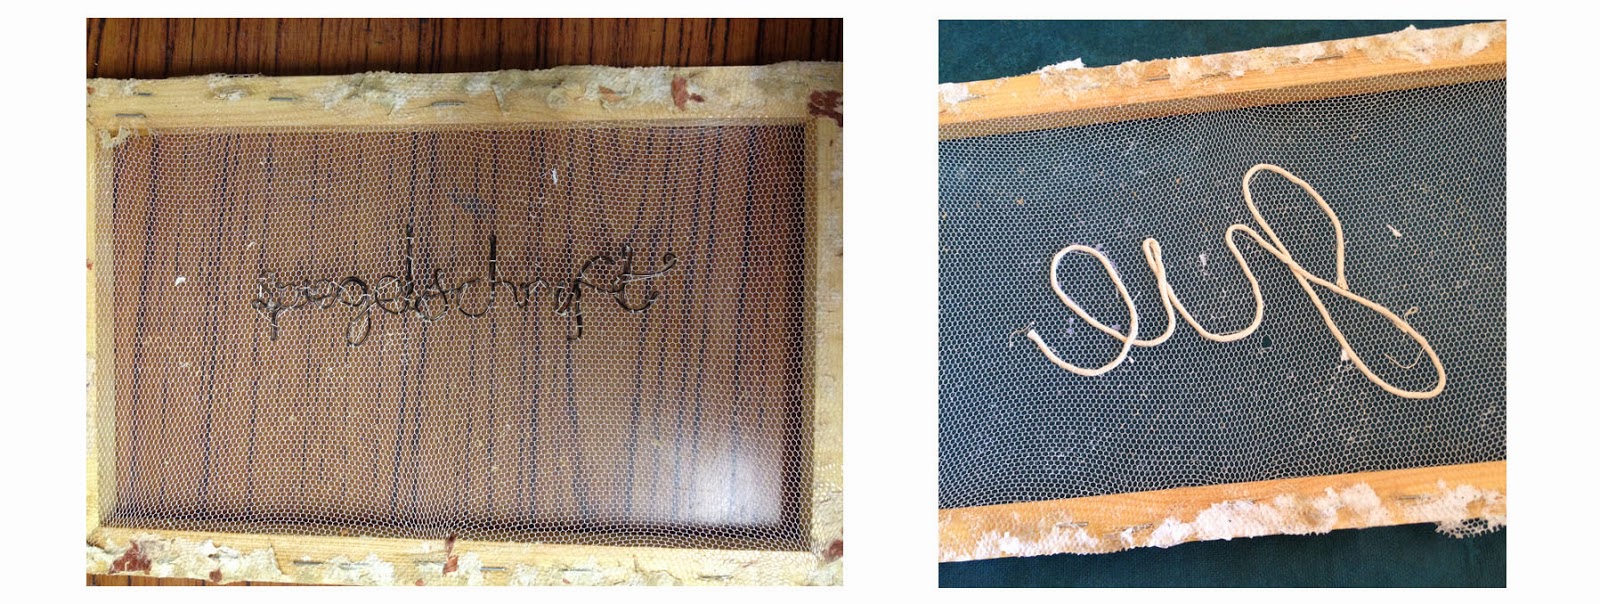
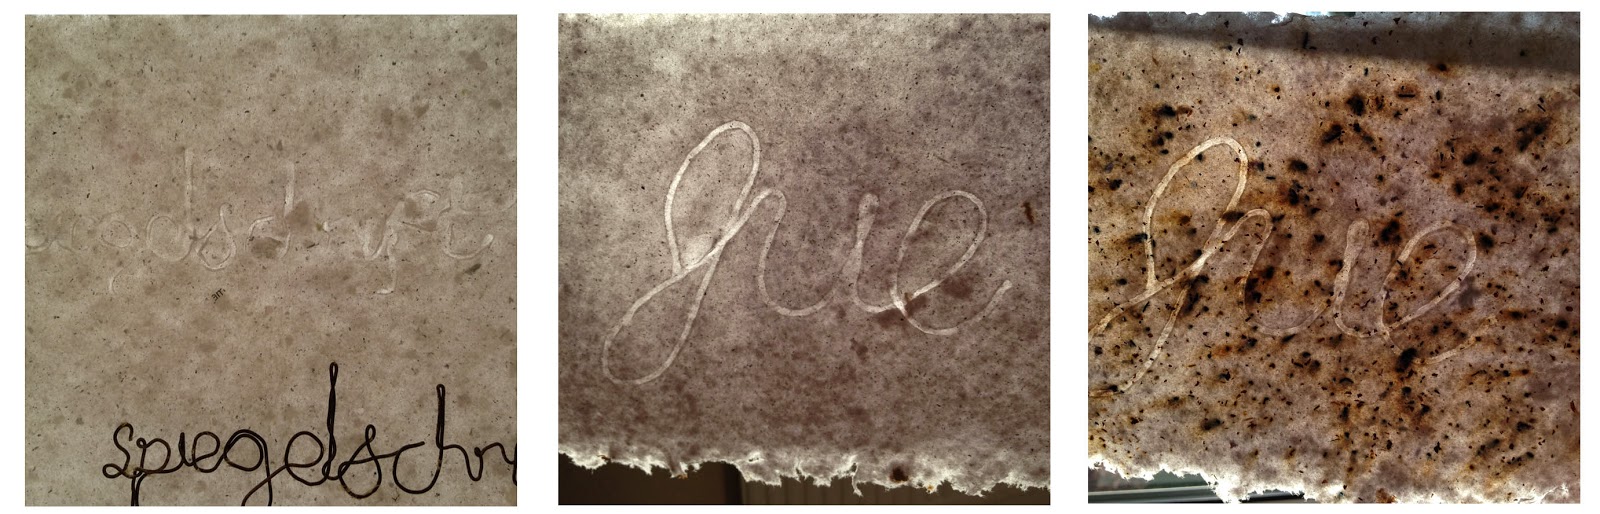
Another form of
EMBOSSING uses a shape made from wire or string and stitched onto the mesh before dipping the paper into the pulp to give a WATERMARK. After discussing my backwards text with Sian at Summer School, we thought it might be a fun idea to work on mirror text and secret codes, so for my first attempt at embossing, I used the word '
spiegelshrift' which I believe means 'mirror writing' in German.
 |
| 40412 |
I think the wire proved to be a little too thin, or my paper too thick as the word was only just noticeable and quite hard to read, so I made a new design out of string using '
Jue' for want of a better short word! This gave a much better watermark. The last sample is embedded with tea leaves.
 |
| 40413 |
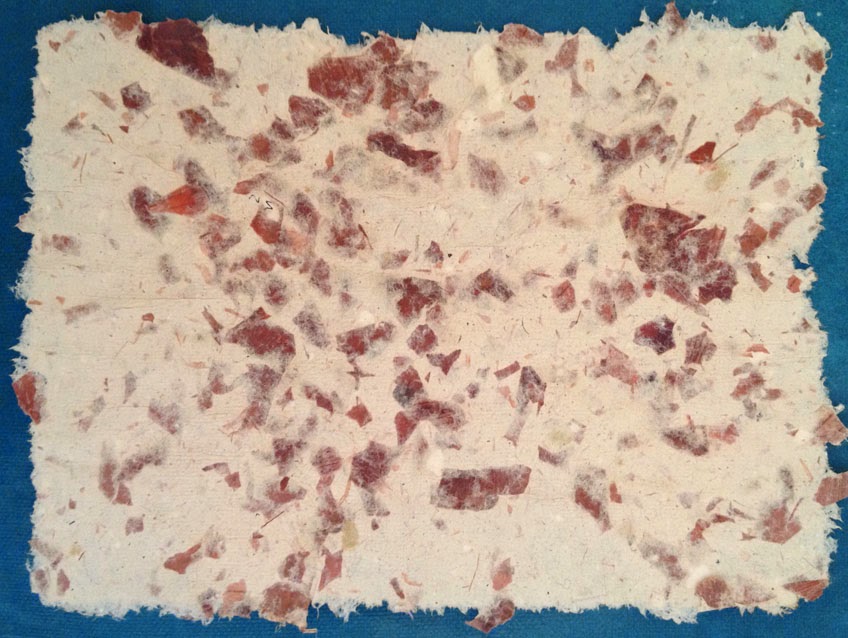
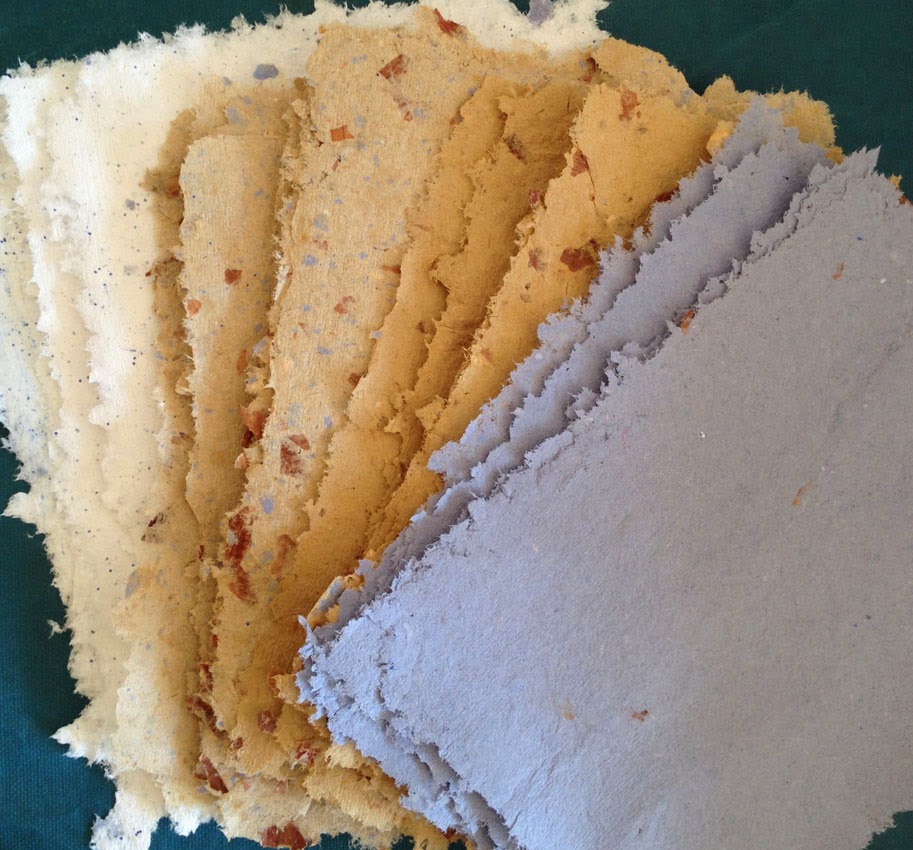
For the last few weeks I have been adding loose onion skins into my little bag of onions at the supermarket. I think the check-out girls think me a little peculiar, but hey ho! I boiled up the onion skins, and then chopped them up in the blender with some white pulp to make an onion skin pulp vat. I was so pleased that I'd made the effort as the resulting paper was beautiful (and didn't smell at all!). I considered showing the check-out girls my paper, but I think that might confirm their suspicions!
 |
| 40414 |
I made a third kind of watermark by cutting a heart shape from a piece of thin plastic, laying it on top of the mesh as a stencil, and forming a sheet of paper. Once the plastic heart stencil is removed, leaving a heart shaped hole, a second sheet of paper is laminated over the first, giving a watermark effect.
 |
| 40415 |
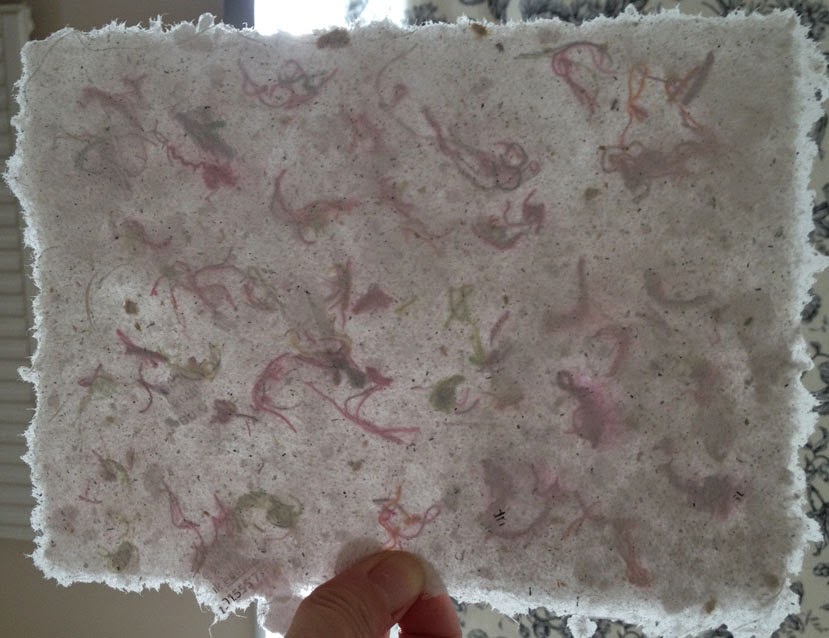
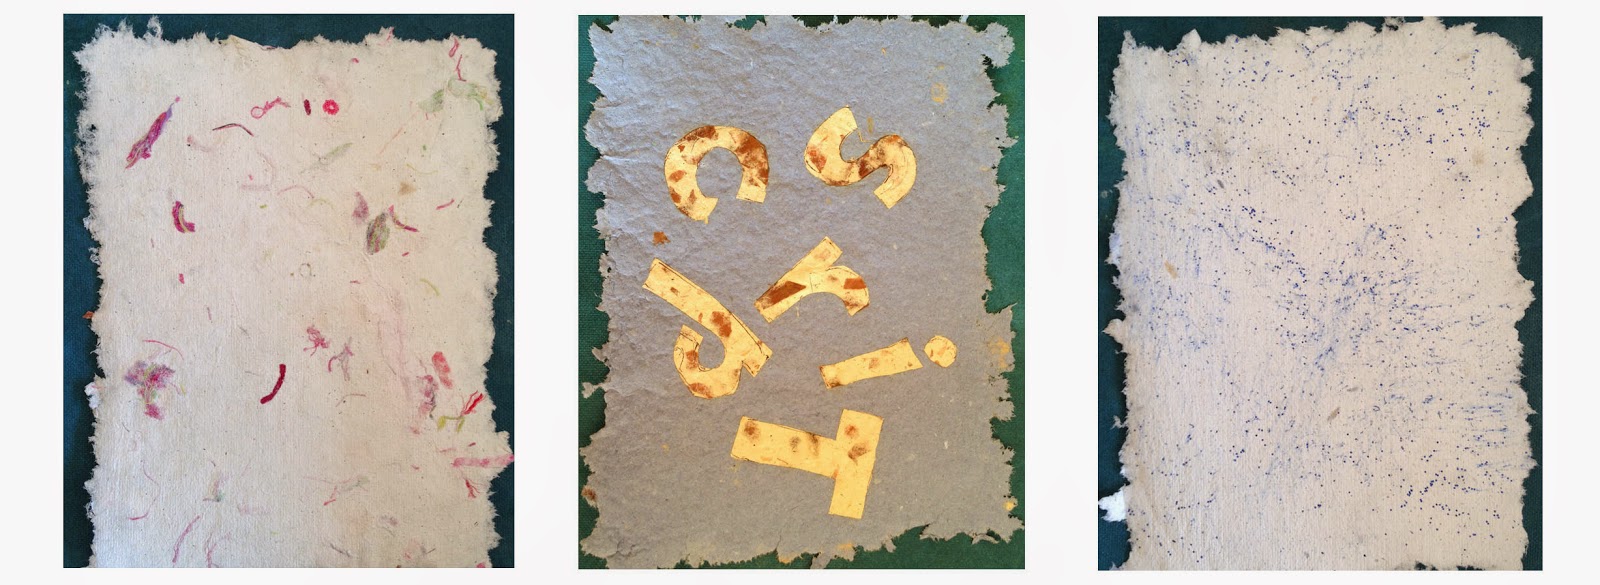
Coloured threads were then
EMBEDDED into a sheet of white paper by sprinkling them over the surface before pressing the paper.
Letters were cut from a sheet of onion paper and embedded into a sheet of blue paper.
Blue glitter was sprinkled onto a sheet of white paper and embedded into the surface.
 |
| 40416 |
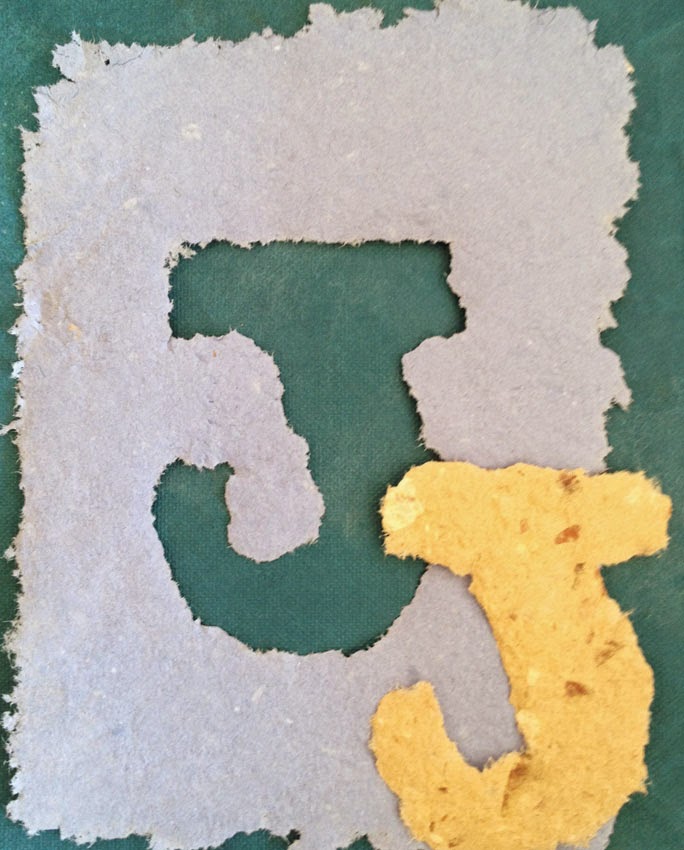
With a stencil knife, I cut a letter 'J' from a piece of thin plastic. This gave me a positive shape and a negative shape.
I placed the plastic sheet with the 'J' shaped hole onto the mesh and dipped it into the pulp to form a small piece of paper in the shape of a 'J' as the pulp did not attach itself to the mesh where the plastic was.
For the next experiment, I placed the plastic letter onto the mesh and pulled a piece of paper. This time, when I lifted the plastic 'J', there was a 'J' shaped hole in the paper.
 |
| 40417 |
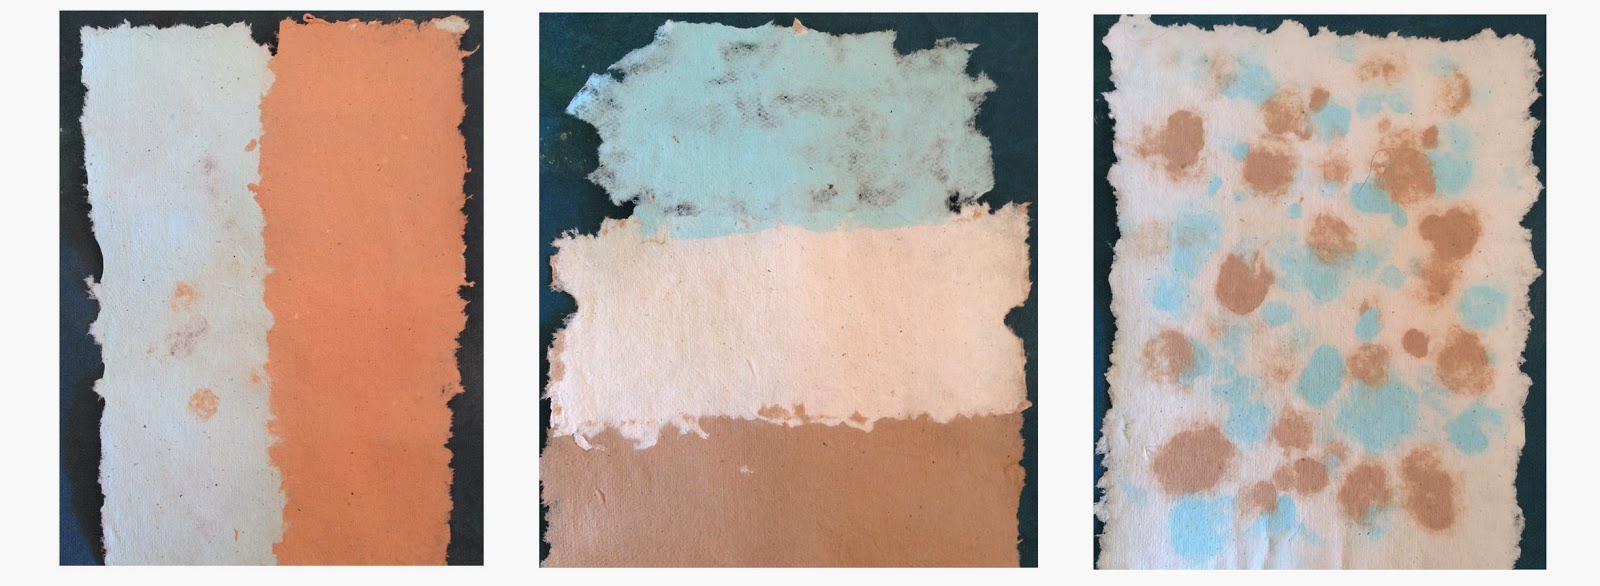
I dyed some white pulp with procion dyes making one vat of blue and one vat of reddish brown. I used a narrow strip of metal mesh to dip into the vat to make a narrow strips of paper in each colour and placed them together, overlapping them slightly before pressing.
For the last colour sample, I spooned blobs of dyed pulp over a sheet of white paper.
 |
| 40418 |
I decided to try the last experiment with my original vats of brown (manilla envelopes) blue (paper hand towels), onion skin, & white paper pulp. These appeared to give better results, but only because the colours were better and the vats were bigger and contained more pulp. I'd rushed through the dyed samples on a much smaller, more 'frugal' scale.
 |
| 40419 |
As I had a lot of pulp left over, I sprinkled blue glitter into the vat of white pulp and added a solution of PVA to size the paper, making it more suitable for writing and drawing onto. I then made as many sheets of paper as I could till I used up the pulp.
I mixed the remainder of my onion skins with the small amount of brown pulp I'd got left. Added PVA and again, made as many sheets of paper as the remaining pulp would allow.
I did the same with the blue pulp.
I then drained the water from the small amounts of remaining pulp and mixed it all together, forming one last vat of multi-coloured pulp, and again made as many sheets as I could.
I now have a beautiful stash of coloured papers for writing and drawing onto.