Monday, 29 October 2018

Module 6 – Chapter 1–Drawing Methods

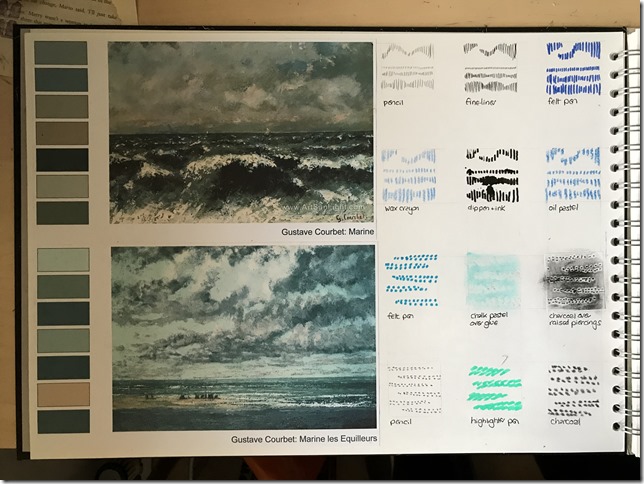
I made a collection of colour photographs  of different types of skies or water effects. Some were photographs of my own, some were from Google Images. I was looking for interesting colour combinations and areas of textural effects in the sky, wonderful cloud formations, textural effects and water surfaces - ripples, reflections, froth and bubbles.
 
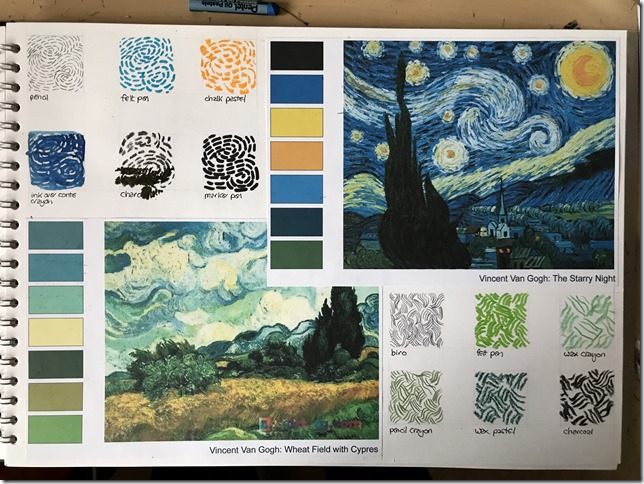
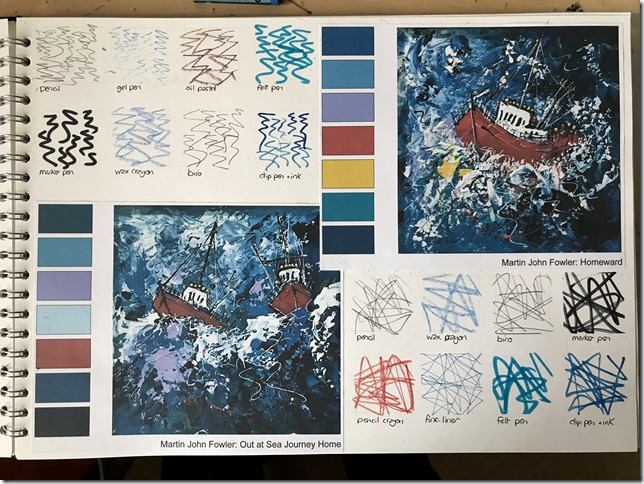
I also collected images of work by painters who use water and sky as their inspiration.

20181014_103202391_iOS
06.01.01
Using as many varied drawing implements as I could find, I made marks covering a small area of 4x4cm, inspired by the patterns that I could see in the image.
For size reference, all of the following work is carried out in an A3 sketchbook.

20181014_103212695_iOS
06.01.02

20181014_103226352_iOS
06.01.03

20181014_103238055_iOS
06.01.04

20181014_103251665_iOS
06.01.05

20181014_103259897_iOS
06.01.06

20181014_103313554_iOS
06.01.07

20181014_103335033_iOS
06.01.08

20181014_103347325_iOS
06.01.09

20181014_103401786_iOS
06.01.10

20181014_103409185_iOS
06.01.11

20181014_103423318_iOS
06.01.12

20181014_103429550_iOS
06.01.13
I then selected a few of the marks made in the previous exercise and made similar sized areas of texture and pattern by building up more than one layer of the same type of mark in each patch, but using different implements.

20181015_170855548_iOS
06.01.14
SGRAFITTO

I experimented with different types of crayon in contrasting colours, one layered over the top of the other, to see which top layer could be scratched away to reveal the colour below.

20181021_082212193_iOS
06.01.15
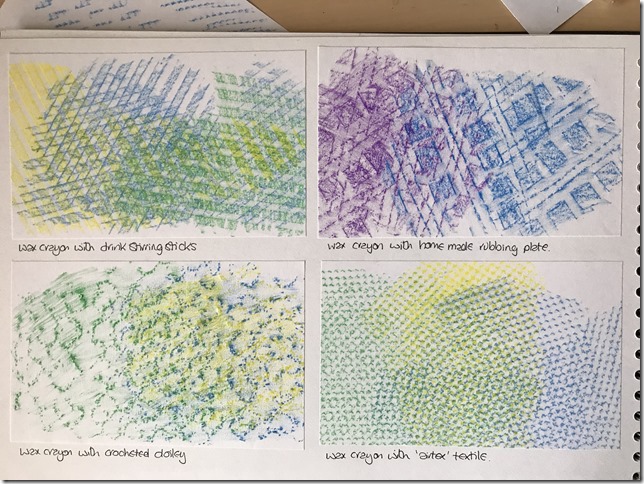
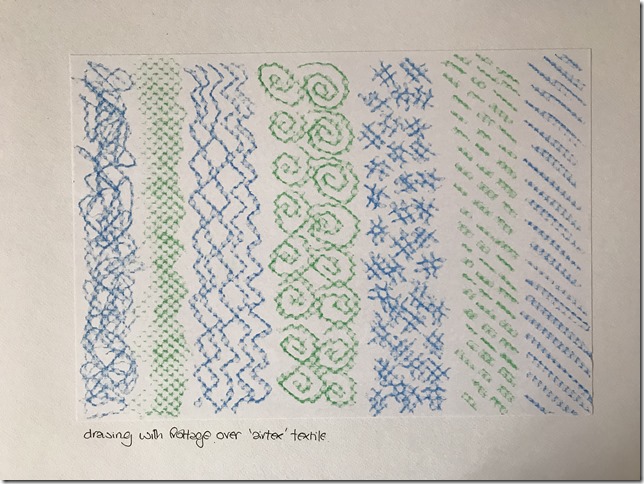
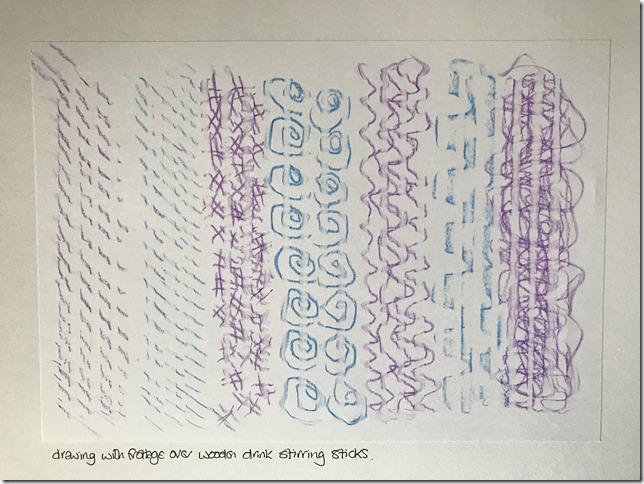
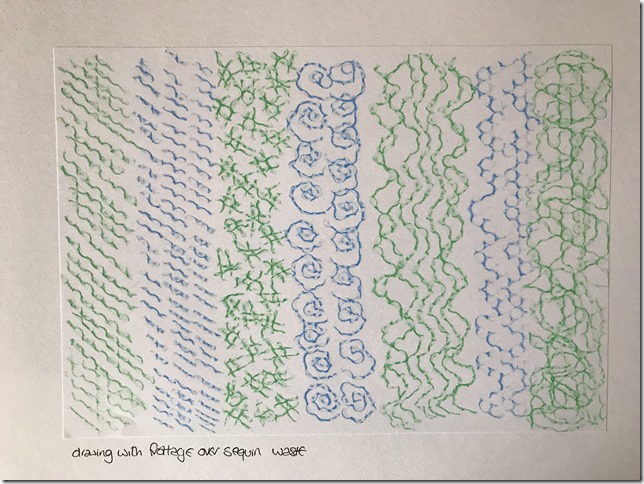
FROTTAGE

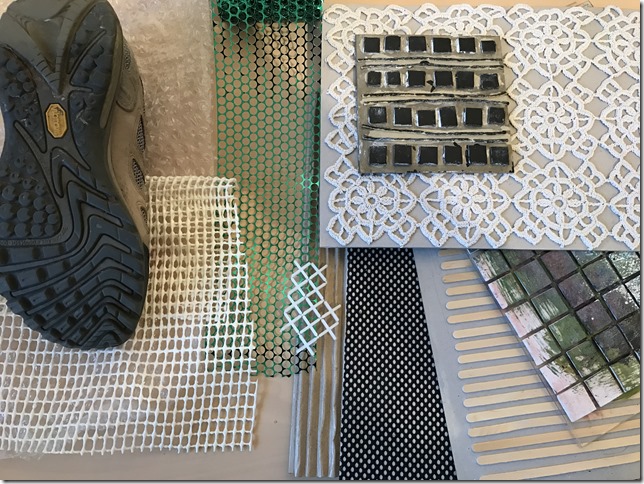
I made a collection of textured and patterned surfaces to make rubbings.

20181025_151946179_iOS
06.01.16

20181027_145519875_iOS
06.01.17
I moved the relief surface under the paper to give different rubbed effects, building up layers of crayoning. I found wax crayon on standard copy paper gave the most successful results in this exercise.

20181027_145527956_iOS
06.01.18

20181027_145543572_iOS
06.01.19

20181027_145548983_iOS
06.01.20

20181027_145610733_iOS
06.01.21

20181027_145616172_iOS
06.01.22
RESIST METHODS

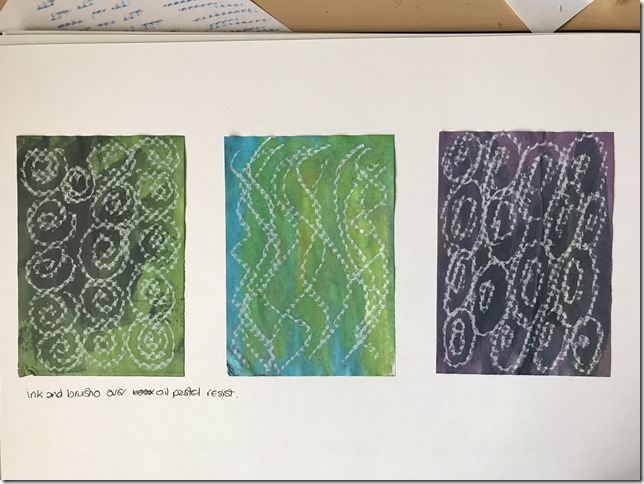
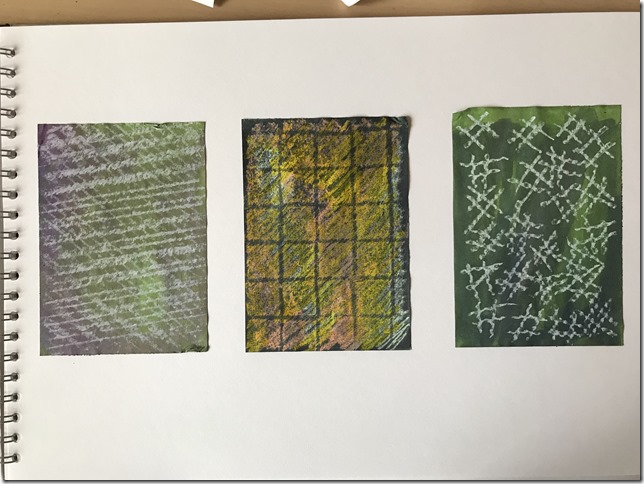
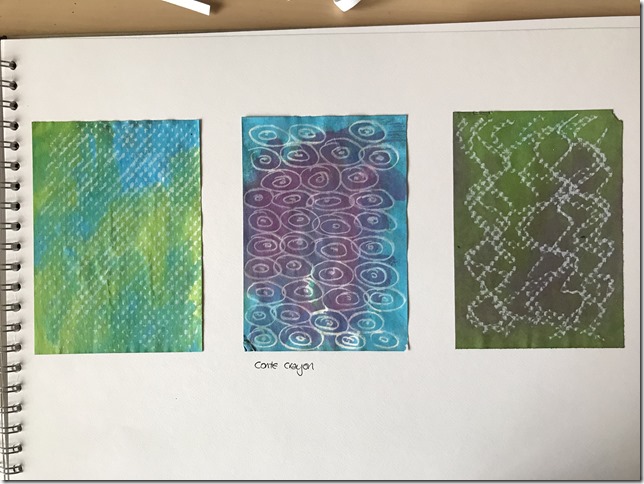
I used oil pastel and conte crayon to draw patterns, sometimes over texture plates.
I then used a painted black quink ink, green & blue brusho, and purple procion dye over the surface, allowing the liquid inks to flow off the waxy or chalky surface of the crayons.

20181027_145632553_iOS
06.01.23

20181027_145638642_iOS
06.01.24

20181027_145648567_iOS
06.01.25

20181027_145654246_iOS
06.01.26
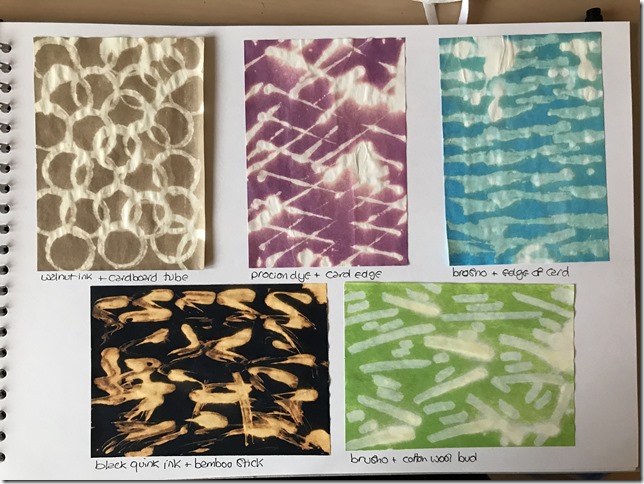
DISCHARGE

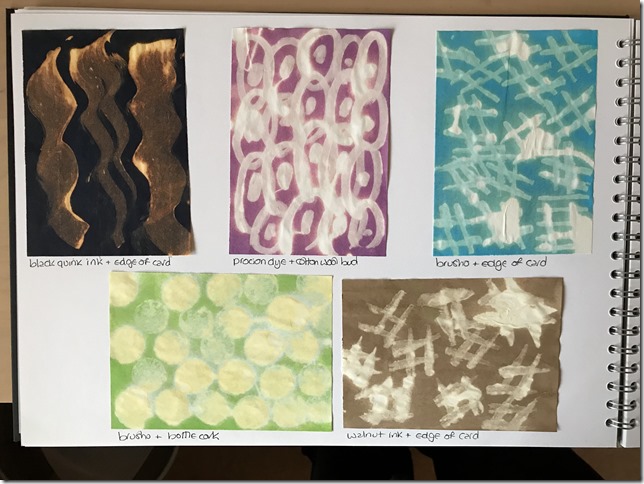
I painted papers with black quink ink, walnut ink, brusho and procion dye, and let these dry. Colour was then removed using bleach and a variety of different mark making implements. I found this process much less controllable than the others. Bleach dribbled across the page. Sometimes it left large, heavy deposits that bleached colour away very strongly. In other areas it gave very fine, scratchy marks. This gave random, disorderly, but exciting results. I particularly liked the way the black quink ink bleached out to a sort of rusty colour.

20181027_155325199_iOS
06.01.27

20181027_155331398_iOS
06.01.28

20181027_155341635_iOS
06.01.29

20181027_155346666_iOS
06.01.30
TRANSPARENT SURFACES

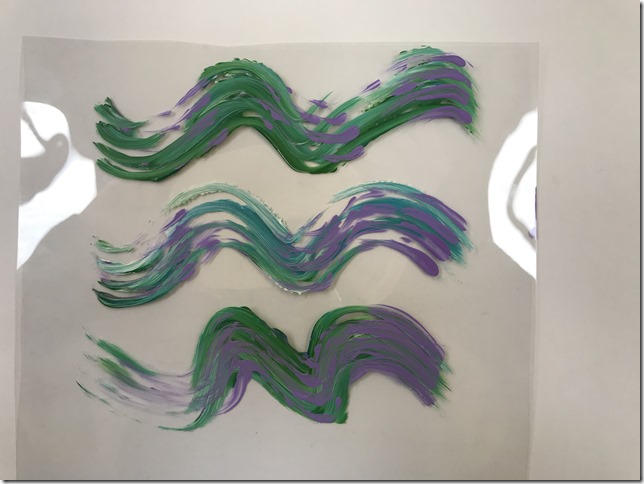
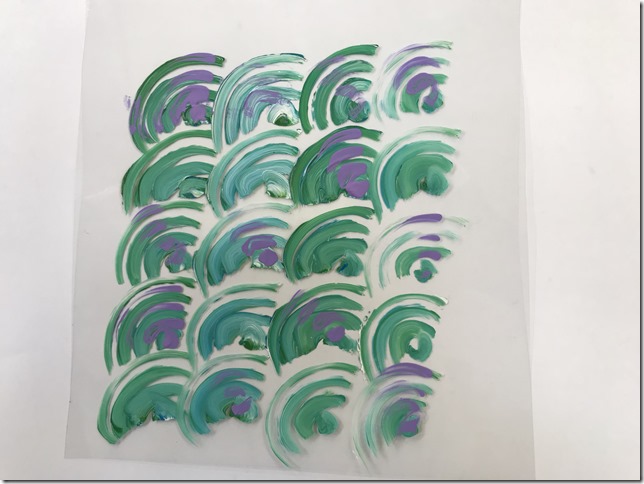
Using a sponge brush, I made marks onto transparent acetate with acrylic paint.

20181031_145429001_iOS
06.01.31
over the top of the acrylic paint, I painted ‘thermo-chromatic’ screen printing ink in purple.

20181031_145515797_iOS
06.01.32
when subjected to gentle heat eg, radiator or hairdryer, the purple ink turns pink.

20181031_145443781_iOS
06.01.33

20181031_145544581_iOS
06.01.34
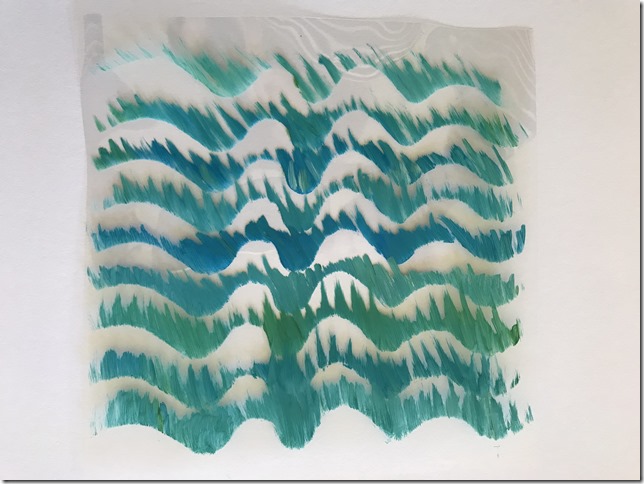
I cut a wavy edge from a piece of paper, and dragged paint from the stencil, over the edge onto the acetate sheet.

20181029_110002445_iOS
06.01.35
I cut and opened a ‘poly pocket’, painting on the inside, and then refolding. I then fused the poly pocket together using an iron on low heat (over baking parchment).

20181029_110021846_iOS
06.01.36
I did the same with a fine polythene bag. The polythene melted much more easily and started to shrivel away from the heat quite quickly, however I do like the ‘watery’ effect this gives, so I turned up the heat very slightly and ironed a little longer to intensify the effect.

20181029_110033873_iOS
06.01.37
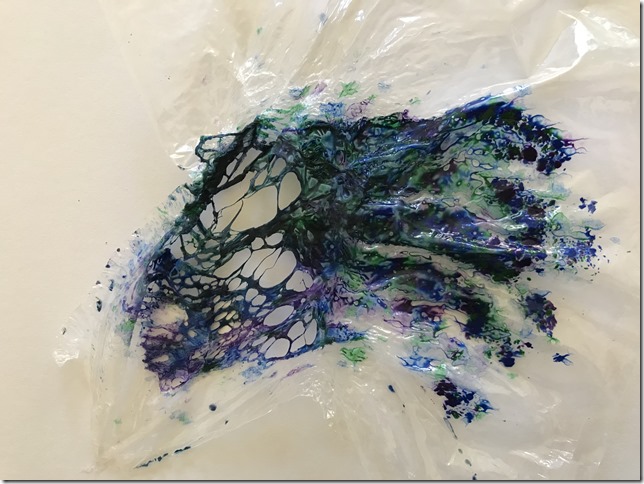
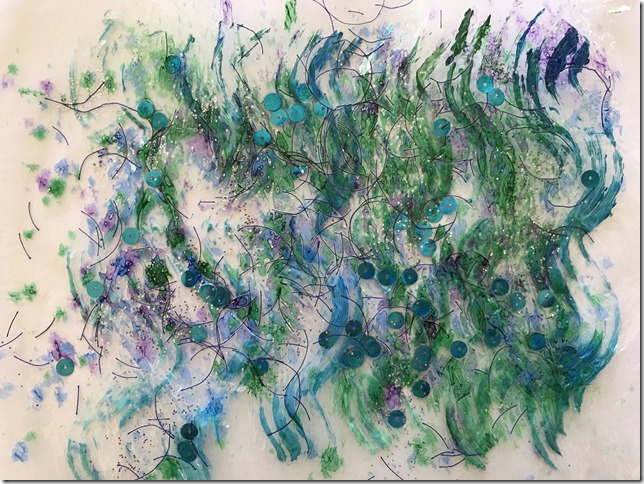
Again with a polythene bag, I sandwiched some wax crayon shavings between the 2 layers. The effect was amazing. The wax melted and blended and followed the ripples as the polythene shrivelled and distorted, but it was very difficult to control the right amount of heat from the iron. I was so pleased with the result that I overheated the sample below as I was trying to make it ‘even better’! The bag melted and made holes in a very interesting and dramatic way.

20181029_110136700_iOS
06.01.38
For the next sample I turned down the heat, but held the iron over the crayon longer. Again, there are some very interesting water marks appearing in the crayon, but I wasn’t quite so happy with the way the colours ‘over-blended’.

20181029_110147137_iOS
06.01.39
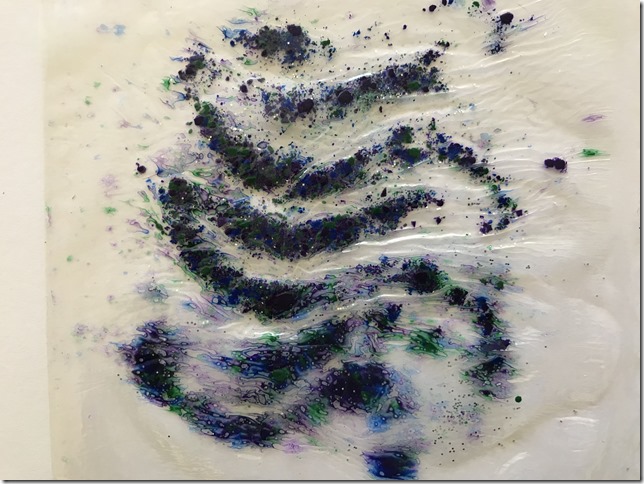
Third time lucky, this was the result I was trying to achieve. Just the right temperature and length of time with the iron, the wax melted without ‘splodging’ and the polythene fused and distorted just enough to give soft ripple effects. I also added a small amount of silver glitter to this sample.

20181029_110201343_iOS
06.01.40
Thread snippets fused inside a poly pocket.

20181029_110213380_iOS
06.01.41
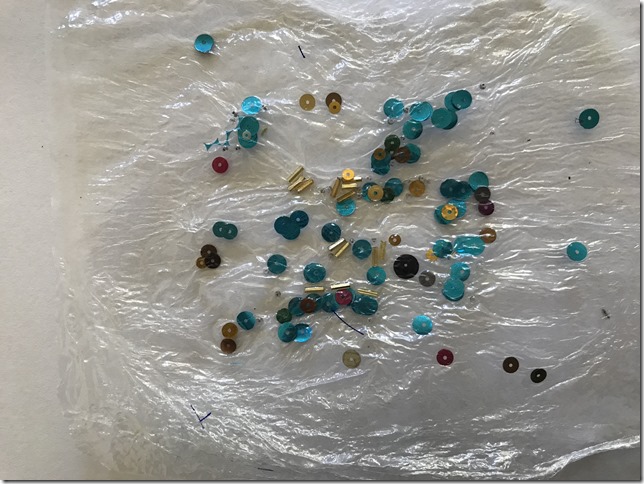
Beads and sequins sandwiched between 2 layers of polythene. This secured the components much more securely than in the poly pocket below, which didn’t seem to fuse around the items quite so closely, allowing them to move around.

20181029_110224974_iOS
06.01.42
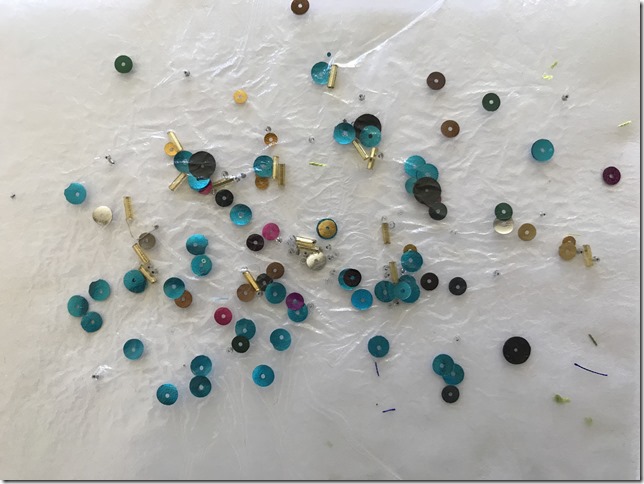
Beads and sequins fused within a poly pocket didn’t seem to fuse so closely around the components, allowing them to move very slightly where the sheets hadn’t quite sealed closely up to the items.
I also found the poly pocket to be a little dull and very slightly cloudy, compared to the plastic bag which remained shiny and transparent.

20181029_110233889_iOS
06.01.43
So then  sandwiched acrylic paint, wax crayon shavings, snippets of thread, sequins and glitter inside a polythene bag, just for fun!

20181029_110255992_iOS
06.01.44
I dragged acrylic paint over bubble wrap to emphasise the textural surface.

20181029_110047602_iOS
06.01.45
I pressed the following samples of painted bubble wrap with an iron. The bubble wrap was surprisingly resilient to the heat. I ironed these samples for a few minutes with a full heat cotton setting. The bubbles eventually popped and flattened, emphasising their circular pattern of the bubbles and creating a more translucent, dull, cloudy surface.

20181029_110101322_iOS
06.01.46

20181029_110119011_iOS
06.01.47

Saturday, 25 August 2018

Module 5 - Health & Safety Rules Observed

  • Bleach: use in a well ventilated area and avoid breathing in fumes. Wear rubber gloves
    to protect skin. Store away from children & pets.
  • Dyes: wear mask to avoid inhaling particles. Keep away from draughts. Wear rubber
    gloves to protect skin. Store upright with lids secure. Keep well away from food
    preparation areas, and also away from children and pets. Clean tools after use.
  • Adhesives: always read manufacturers instructions before use. Use in well
    ventilated area, away from naked flames. Keep away from food preparation areas.
    Store upright with lids secure, away from children & pets. Avoid contact with skin.
    Clean tools after use.
  • Knives, scissors and rotary Cutters; Never pull a blade towards you. Keep fingers
    well away from path of blade. Fasten rotary cutters after use. Put tools away after
    use and store well out of reach of young children.
  • Pins and needles: store well out of reach of young children, and ensure that no pins or
    needles are left lying around on floors or work surfaces.
  • Iron: always unplug after use, and do not leave unattended. Sore away when cool
    with flex lightly wound.
  • Heat gun and soldering iron: use on a head resistant mat. Unplug after use. Allow tool
    to cool before putting away. Keep away from children and pets when in use. Ensure wires
    and plugs are tucked away so they are not tripped over. Wear a mask and use in a well
    ventilated area. Take care when handling items that have just been exposed to heat.
  • Sewing machine: unplug and keep covered when not in use.

Module 5 - Storage of Work, Materials, Tools and Equipment

Design work in progress: kept flat, in a large folder.
Completed embroidery: wrapped in acid free tissue paper inside a box.
Completed design work: kept flat, in a large folder.
Papers for design work: kept flat, in a large portfolio.
Inks and paints for design work: kept upright, with lids secure, inside store cupboard.
Glue, bleach & sprays: as above.
Embroidery work in progress: inside a workbox with needles, scissors etc, kept in a store cupboard
away from children and animals.
Fabrics: folded neatly, wrapped in acid free tissue paper and kept flat inside storage basket.
Threads: in special clear storage boxes for easy viewing, separated into colour groups.
Beads, metal threads etc: in acid free tissue paper inside storage box in store cupboard.
Dyes, paints, etc: kept upright, with lids secure, inside store cupboard.
Sewing Machine: kept upright on table in workroom, covered when not in use.
Other electrical equipment: on shelves in store cupboard, flex lightly wound.

Friday, 24 August 2018

Module 5 - Costing Materials and Recording time


Costing
box frame: £4.50
fabrics: £9.00
threads: £7.50
dyes: £7.00
beads: £2.25
wire: 50p
foam board: £1.00

Timing
design time: 3 hours
stitching/making: 48 hours

Module 5 - Evaluation of Completed Work

The completed embroidered assessment piece for Module 5 is a Resolved Sample based on the design topic of Texture in Landscape.

20180805_135714664_iOS

Do you feel satisfied with the results?

Yes. I feel that the individual textural components within the design are extremely successful. I am very happy and content that they fill the brief of four different panels displaying extreme textural contrasts, whilst maintaining a limited colour palette.
I was originally unhappy with the way the four panels combined to make a whole, but after a discussion with Sian during my tutorial at Summer School, we agreed solutions for adapting and evolving the design to make it more ‘coherent’. I further adapted our strategy, through experimentation, when I got back into my workroom, but after talking to Sian, I felt confident that I could work through the problems and resolve the issues, allowing me to re-work the design, resulting in a much more considered and pleasing piece of work.

Is it fit for its purpose?

Yes. The work shows four areas of extreme textural contrasts, using fabric manipulation and embroidery. I have used a limited colour palette, and there are various levels of height within the work.

If you were asked to make it again, what changes would you make?

When photographing the work, I noticed that it was much more pleasing when I zoomed in on just 3 or 4 panels. I think I would reduce the ‘pattern’ down to a smaller cross-section of design. I think this simpler version would appear much more harmonious.

Module 5–Chapter 13–Study of Three Artists

Jennie Rayment

clip_image002
051301
Jennie Rayment is a very amusing, entertaining and talented public speaker. I was fortunate enough to attend a lecture at a local Embroiderers Guild Regional Day where she performed her famous ‘strip’ Show and Tell routine!
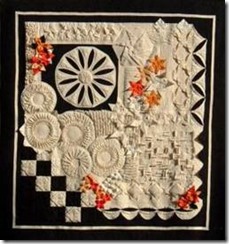
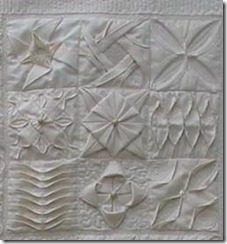
I really like the way she uses calico and natural coloured fabrics in a lot of her work, allowing the manipulated textures to ‘speak for themselves’.

b1ed59a2f436d309263bf7c4243eef8c
051302
Jennie Rayment is an internationally known textile artist from Hampshire, UK. She is a tutor, and author, specialising in fabric manipulation and surface texture.
clip_image004
051303
In 1989, after several different career moves from managing hotels, inns and restaurants to running a village general store and Post Office, Jennie saw her first piece of patchwork and made her first quilt. Having never sewn other than family mending and household repairs.
Over the next few years, Jennie explored and experimented and by 1994, she was firmly hooked on all forms of patchwork and quilting. In this period she completed a teaching diploma, and taught the Creative Studies course in Patchwork, Quilting and Appliqué to several groups in the South of England.
Much of her work is created in simple calico. Her textile manipulations may be adapted for any type of fabric and used to make quilts, wall-hangings, boxes, baskets, cushions, table linen and of course fashion garments and accessories. She describes herself as being obsessed with twiddling, fiddling, nipping, tucking, manipulating and manoeuvring.
clip_image006
051304

Nowadays, her work is exhibited in various galleries, at shows and exhibitions around the world.
Jennie has published many books on fabric manipulation techniques. She teaches a wide variety of classes for all levels and abilities of sewers from patchworkers, quilters and embroiderers to fashion, soft furnishing and home décor enthusiasts, and entertains with hilarious lectures with real ‘Strip, Show and Tell’.


Michael Brennand-Wood

Michael-Brennand-Wood-portrait-website
051305
I was lucky enough to attend a lecture by Michael Brennand-Wood at the ‘Midland Textile Forum’ Symposium a few years ago. I found him to be a very relaxed, down-to-earth, ‘rock-n-roll’ sort of guy. Very honest about his upbringing and the reasons stitch, and making, became an important part of his life and career. He wore a red & black stipey mohair jumper, and reminded me of a cross between Denis the Menace, and Johnny Rotten!
mbw_large4
051306
Michael Brennand-Wood’s interest in textiles goes back to his childhood. His grandmother was an industrial weaver who worked in a mill in the north of England and as a small boy he used to play with fabrics that she bought home. She also taught him to knit, sew and do a little embroidery. Her brother had a little loom at home and the noise and smell of the loom is a strong childhood memory.
His grandfather was an engineer. He had a shed at the bottom of the garden where he made things in wood and metal. He was an old-fashioned craftsman who really enjoyed making.
At University, Michael wanted to study fine art, but when he discovered the textiles department he felt much more at home and decided to stay there. He chose to study embroidery as it was far the most open-ended area of textiles and the area closest to fine art as he saw stitching as drawing in thread.
Until 1989 he worked as a lecturer at Goldsmiths alongside Audrey Walker, as senior lecturer in the department of visual art. He has taught extensively in colleges and universities in the UK and overseas, and has undertaken residencies in Japan, Australia, New Zealand, Canada, and Belgium. He was appointed Visiting Professor at Manchester Metropolitan University in 2005 and is Research Fellow at the University of Ulster.
michael-brennand-wood_3
051307
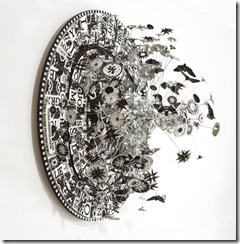
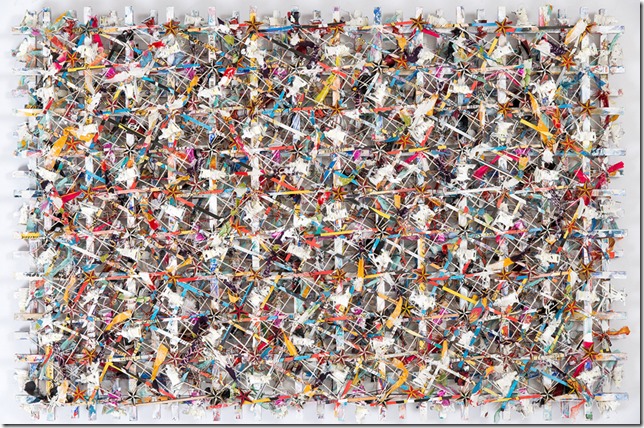
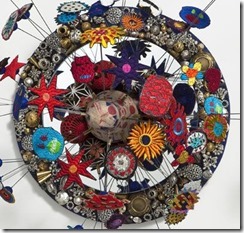
Michael now has an international reputation as one of the most innovative and inspiring artists working in textiles today. His work is sculptural and tactile. He is particularly interested in embroidery, lace-making and traditions in floral textiles. He uses his knowledge in these ancient crafts and combines them with modern day techniques, such as digital printing and computerised machine embroidery, to create sculptural, wall-hung, textile and multimedia pieces.
31377351f2020ae60eb8dd018eeec464
051308
Although his work is first and foremost decorative it can be read on more than one level. Michael uses titles to allude to the source of inspiration for each one of his works. Recent flag-based pieces, for example, reveal their reference to conflict and war when seen up close.


Jean Littlejohn

This course would never be complete without giving credit and offering gratitude to one of my all time stitch heroes, Jean Littlejohn. I spent many happy hours admiring Jan and Jeans books in Waterstones bookshop in New Street, Birmingham. I can’t remember when I started to buy the books, but gradually, one by one, I now have them all. Videos as well, and could never tire of watching them. Always learning something new, they are a constant source of inspiration.
I am fortunate enough to have enjoyed taking part in a few workshops with Jean (and Jan), and thanks to Sian’s Distant Stitch Summer School, was able to spend an entire weekend in their presence, enjoying workshops, lectures, and even dinner at the same table!!!

20180823_194944023_iOS
051309
Jean Littlejohn, along with her long-time stitch & business partner Jan Beaney, is the Joint President and Honorary Member of the Embroiderers’ Guild. She is a Fellow of the Society of Designer Craftsmen and a member of the 62 Group. She is one of the best-known teachers of textile art and has held workshops in the UK, across Europe, the USA, Canada, Australia and New Zealand.

jl1
051310
Jean was born in Maidenhead, England. She trained as a teacher, specializing in Art and Textiles. Her work has been exhibited and sold in the UK, USA, Australia, Germany, Israel, Japan and many other parts of the world. In 1997, Jean co-founded Double Trouble Enterprises with Jan Beaney. This company was formed to publish books and promote further interest in embroidery and allied subjects. Their aim is to give students the confidence to design and create their own unique work. They have published 27 books and 3 DVDs.

JanJean4
051311
Winter-Solstice_Jean-Littlejohn-6_w-1200px
051312
Jean teaches all aspects of work, from design to embroidery. Much of her work is based on hand stitch where she builds up many layers of stitch (hand and machine) and mixed media to create the most amazingly textural works. She experiments with hand stitch, pushing the boundaries of traditional methods and materials, exploring exciting new effects and patterns that can be achieved with simple stitches to describe echoes from the past, layers of life and experience, and aspects of decay.

jl4
051313