Saturday 7 December 2019

Module 6 - Evaluation, Records and Authentication

The completed embroidered assessment piece for Module 6 is a wall hanging, based on the design topic of Conservation.

It is fit for purpose as the piece is an embroidered wall hanging, and I feel that it successfully demonstrates my concerns for Global Warming and its effect on Inland Wetlands.

I am extremely happy with the resulting conclusion. The work is very similar to my original design, but has been adapted and evolved slightly as I have noticed exciting design opportunities along the way. I like the way it demonstrates global warming with very subtle colour change effects when heat is applied. I like the way I've left gaps in the reeds and produced a lace like effect in the water, so that light shines through the gaps, hoes and spaces, and I'm happy that I manged to achieve the effect that the work is suspended 'in mid air' by use of the fishing wire.

Hopefully, as the work is suspended within a frame, the hanging could be placed in a window, attracting sunlight. The warmth of the sun would allow the thermochromic colour change effect that is designed to imply Global Warming.

If I were asked to make the hanging again, I think I would pay greater attention to the back of the work, so that it could be hung/displayed in a more central location and be viewed from all directions.

Costing:
Papers for design work £5.00
Paints for design work £5.50
Polyester fabric £3.50
Transfer dyes £4.50
Romeo Aquafilm £15.00
Thread £35.00
Wood £15.00
Screws and brackets £7.50

Total: £91.00

Timing
Design work: 3 hours
Total work spent on embroidery and construction: 115 hours

Authentication:


Storage of Tools and Equipment:

Design work in progress: kept flat, in a large folder.
Completed embroidery: wrapped in acid free tissue paper inside a box.
Completed design work: kept flat, in a large folder.
Papers for design work: kept flat, in a large portfolio.
Inks and paints for design work: kept upright, with lids secure, inside store cupboard.
Glue, bleach & sprays: as above.
Embroidery work in progress: inside a workbox with needles, scissors etc, kept in a store cupboard
away from children and animals.

Fabrics: folded neatly, wrapped in acid free tissue paper and kept flat inside storage basket.
Threads: in special clear storage boxes for easy viewing, separated into colour groups.
Beads, metal threads etc: in acid free tissue paper inside storage box in store cupboard.
Dyes, paints, etc: kept upright, with lids secure, inside store cupboard.
Sewing Machine: kept upright on table in workroom, covered when not in use.
Other electrical equipment: on shelves in store cupboard, flex lightly wound. 

Health and Safety Rules Observed:

Dyes: care must be taken to avoid inhalation of particles when mixing dye powder. A mask should be worn at all times. Ensure dyes are stored out of the reach of children and pets.
Sewing Machine: ensure that lead is kept out of the way to avoid tripping over. make sure chair has a back rest and is at a comfortable height, especially during long periods of sewing.
Scissors: Ensure scissors are stored away safely and kept out of the reach of children
Pins and needles: Ensure pins and needles are kept in their correct cases and cushions. Make sure none fall on the floor and get trodden on.
Iron: Always disconnect iron when not in use, and ensure the lead is kept out of the way to prevent tripping. Store in a safe place when not in use.


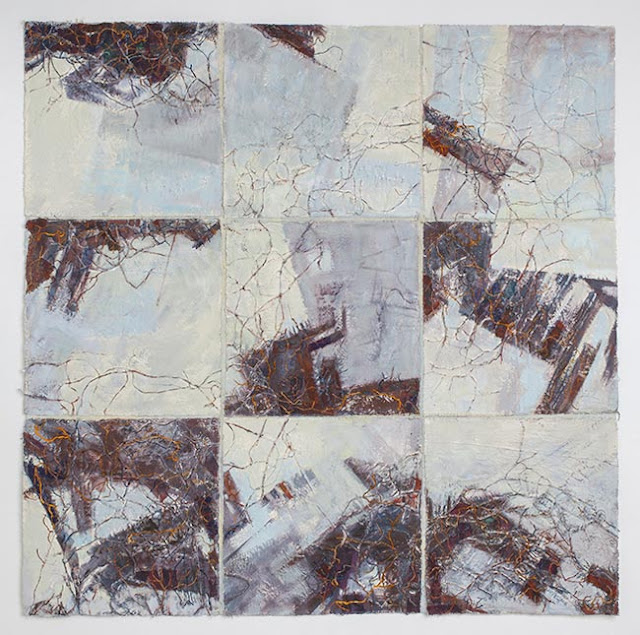
Module 6 - Chapter 12 - Study Three Artists

Jae Maries


Jae is a free-lance artist and tutor, and a member of the 62 Group. She has a BA Hons in Fine Art, and a Diploma in Creative Embroidery. She exhibits internationally, and has work in several public collections.


Her work explores the relationship between people and their environment, and more recently interprets her own personal environment, through paint and stitch.


Her preliminary work is mostly done in visual diaries, through symbolic and abstracted mark making, which is then translated into larger series of art works. She enjoys the challenge of combining oil paint with stitched textiles and relishes the contrast between the hands-on, sensual quality of working with fabrics and threads, and the thrill and spontaneity of brush marks.


Barbara Lee Smith


Barbara in an American Mixed Media artist, living in the Pacific North West where she is surrounded by grand and subtle beauty, which has encouraged her to work with the landscape. She 'works from within', reflecting the way she sees nature, and makes visible her emotional response to what she sees, feels and remembers.


Barbara uses a sketchbook as a journal. Along with her sketches, it includes lists of 'what if's?' , ideas, quotes, photo's and things to try. She also uses her sketchbook to record samples of paints, pigments and different technical experiments.


Barbara uses Lutrador as a base for painting and spraying acrylics and silk paints. She layers the Lutrador to form a heavy base where she continues her process by collaging small elements of the same painted material, which are heat fused together to bind and further stiffen the material. She describes her work process as cut, melt, burn, tear, sew, mend and colour.


Once the composition is complete, she then uses an industrial sewing machine to stitch lines to represent a topographic or navigational map that literally and visually ties the various layers of paint and collage together. She stitches from the back to introduce an element of surprise to her work, and also because she uses a rayon thread in the bobbin that introduces a sheen to the surface of the work. This thread would not be strong enough to use in the top of the machine.


Barbara is an honorary member of the Embroiderers Guild.

Sandra Meech


Sandra is originally from Canada, but now lives and works in the UK.


Her work is inspired by nature and a 'sense of place'. Global warming and the effects of Climate Change on forests and trees as well as in the polar regions, has been seen in many series of works over the years.


Sketchbooks, and collage composition of photographs and painted papers are a great influence on how her work evolves, and photography and transferring images onto cloth are a feature of most of her textile work.


Her recent work is based on 20 years of Arctic and Antarctic inspiration, using her passion for ice, icebergs, and glaciers as a creative theme. Her 'Polar Melts' stitch studies use orange thread to reflect the melting ice caused by Climate Change.


Thursday 31 October 2019

Module 6 - Chapter 11 - Making Your Wall Hanging

It was important that my design was self supporting, allowing light to shine through the various lacy panels, and hopefully, to allow the colour-change of the thermochromic ink with heat from the sun. Ideally, it would be hung in a window.

I started by tracing off the water panels, and stitched fifteen individual panels of lacey chiffon.

06.11.01

06.11.02

'Waves' were then traced from my original design, and cut from my denim panels. These were sewn onto the lace panels using whip stitch in white thread to replicate the torn edges of my paper design. The torn edges appeared to give a lovely 'frothy water' effect on my paper design and I really wanted to attempt to reproduce the effect in stitch.

06.11.03

 Zig zag stitch onto dissolvable fabric 'gathered' the panel and made the reed panels much narrower than desired, therefore calculations and a little trial and error was needed.
With a little experimentation, and a lot of luck, I guestimated that I should split the traced off panel shape into equal strips, and added 2.5cm spaces.

06.11.04

I traced the resulting extended shape onto dissolvable fabric, and stitched a basic background framework structure to support the rows of zig-zag stitch.

06.11.05

(and a random 'selfie' was taken as authentication proof!)

06.11.06


Rows of zig-zag were then stitched over the top of this 'skeleton' in various shades of variegated thread. Angles were changed slightly and gaps were allowed to form in order to create movement.


06.11.07

Once completely stitched, the panel was soaked in warm water to dissolve the stabiliser. and with fingers crossed, the panels all turned out to be the correct width!!! (The gaps allow for minor adjustment where necessary).

06.11.08

The panels are then hand stitched together. The top edge of the reeds has a lovely loose frayed texture which overlaps the water in a semi-realistic fashion. I stitch the water panel over the bottom edge of the reeds to suggest that the reeds are growing through and are surrounded by water.

06.11.09


I experimented with threading the finished panels with either lengths of wicker, or with a gold stitched hand-made cord. I felt the cord looked the better of the two and was more in keeping with my original design.

06.11.10

06.11.11

I had planned all along that the panels would be hung from old wooden bobbins from a cotton mill, and suspended in front of a window, with the panels on the left and the right hung slightly behind the centre panel. The best way of displaying this idea on a portable stand was by using a metal clothing rail. The light from the window would shine through the lacy water panels and the gaps in the reeds, and also, hopefully, on a warm, sunny day, the thermochromic ink would change colour!

06.11.12

06.11.13

The above images are roughly thrown together to get an idea for the finished piece. I like the gold cording, All panels will have this.

06.11.14


HOWEVER...

When finishing the hand stitching on my last panel, I sat back and looked across at my work, noticing that the panel had folded itself into a random rippled affect, which I immediately felt was quite lovely. It had movement and energy that the straight panels were lacking.

06.11.15

06.11.16

06.11.17


So, back to the drawing board, I'm contemplating making a rectangular framework of pallet wood. The base would need to be slightly bigger, to stabilise the structure.

I am going to experiment with soaking my panels in dissolved 'Romeo' stabiliser to stiffen, and to see if I can form permanent ripples in my panels.

The panels will then be suspended by, and stitched to lengths of clear fishing wire which will hopefully be almost invisible, giving the panels the appearance of floating in mid air within the pallet wood framework, allowing light to shine through from behind. 

06.11.18

I will experiment with the gold cord, but I think this will be a lively addition to the piece.

TO CONCLUDE: After soaking each panel in a strong 'soluble stabiliser' solution, I laid them out and allowed them to dry over randomly rolled tubes of plastic which formed lovely permanent ripples.


06.11.19

As intended, I constructed a simple frame from pallet wood and tied lengths of fishing wire through drilled holes onto which I attached my stitched panels. When stitching the panels to the wire, I hadn't anticipated that the stitching would not hold, and would slide down the wire. Fortunately, my husband was present. He disappeared into the garage and returned with lead shot for fishing (apparently fishermen use this to clamp bait onto fishing line! Who'd have known!!!). These 'pellets' clamped onto the fishing wire and held my stitching in place! Wonderful! I was then able to slide these up and down, to rearrange my ripples as desired before clamping tighter and finishing off with a blob of hot glue on the back to hold in place permanently.

I then threaded the gold stitched cord through some of the gaps in the reed sections.

06.11.20
Completed hangings suspended within wooden frame.
The frame measures 32 inches square.

06.11.21

06.11 22

06.11.23
Close up of thermochromic detail when heat applied.

06.11.24
Presentation board.

Wednesday 30 October 2019

Module 6 - Chapter 10 - Converting Your Design into Embroidery

I took the three panels from my chosen design and enlarged them on the computer. Printing out onto A4 paper, I needed to tape the sheets together to produce 3 panels, together equalling A1 in size. This gave me an idea of the size of each are of my design, and I was able to trace off each separate area to produce a pattern, enabling me to know exactly what shape to make each piece of embroidery.

I looked back at my various samples that I've constructed throughout Module 6, and chose techniques that I felt would best represent each of the papers that I had decorated and used within my paper designs.

For the first technique, I printed and sponged some chiffon in purple acrylic and thermochromic ink. The images below show the effect of heat on the thermochromic colour.

06.10.01


Then I cut small lozenges from various shades of the chiffon, sandwiched between layers of aquafilm and zig zag stitched in random wavy lines in various shades of variegated machine thread. When the aquafilm was dissolved, it gave a lovely, see-through lacy effect for one of my 'water' panels.

06.10.02

For the second 'water' panel, I collected a selection of old pairs of denim jeans of varying shades of blue, then sponge rollered them with wavy lines using acrylic paint.

06.10.03

06.10.04

These were then machine stitched in wavy lines using white thread and whip stitch.

06.10.05

Blue polyester chiffon was then disperse dyed with dark indigo wavy lines.


06.10.06

This was then stitched in a series of  wavy lines using a blue variegated machine thread, applied to bondaweb, and then cut to form wave shapes.


06.10.07

A shiny bright blue polyester dress lining fabric was stitched over the top of this in black thread, blocks of circular stitching. This was then cut away to form wave shapes on top of the layer below.

06.10.08

The third technique was to depict the 'reeds' panels. For this, I formed a grid of straight lines on a heavy 'Romeo' soluble film, then over-stitched with row upon row of vertical zig-zag stitch, leaving gaps in places, and stitching at slight angles to depict movement. I used a large selection of variegated threads, and finished with a few rows of metallic gold to add a bit of  'wisdom and knowledge'!

06.10.09


Module 6 - Chapter 9 - Decorative Papers

A range of papers, including khadi paper, cartridge paper, cellophane foil and tissue paper, were decorated in line with my theme, with acrylic paints, inks and dyes to include textured, shiny and see-through surfaces to be used in my design process.

Colours were considered from my initial inspiration source photographs of Middleton Lakes, and also my research and design development throughout this module. I tried to include light and dark tones to allow for more flexibility in the design process, and used complimentary colours from the colour wheel.

I also considered the symbolisation of the colours used.

Indigo represents importance, power and stability. Purple, peace and wisdom, and gold, knowledge. All of these things are 'hanging in the balance' in our current political and environmental climate. With stability, peace, wisdom and knowledge, one would hope that the world would be able to reverse, or at least halt the damage that is being done to our planet, through pollution, deforestation and global warming.

06.09.01
These decorated papers were the cut, ripped an torn to develop a series of designs, based around some of the simple black and white layout experiments from Chapter 8.

All of the following designs were scaled up to approximately A3 in size, and based on the idea of water and reeds, (indicating global warming with the use of thermochromic puple/pink printing ink).

06.09.02

The above design would be based on a number of vertical, long, narrow panels, hung separately. The gaps between the lines of water would be see-through. Method of construction to be determined, but perhaps either by the use of clear cellophane, or perhaps minimal, lace-like stitching between the waves using either dissolvable fabrics, or a delicate insertion method. Consideration needs to be given to strength, due to the weight of the stitching being held.

06.09.03

Similar to the above design, this would also be based on a series of vertical, long, narrow panels, hung separately.

06.09.04

The above design would be one large A1 sized panel with see-through strips between the waves. Construction would need to be considered using similar ideas to the first option.

06.09.05

One really long panel was considered. The only issue I had with this design was the restraints of potential exhibition space with regard to hanging.

06.09.06

After my tutorial with Sian at Summer School, where we speedily discussed all options, her thoughts, comments and advice led me to decide on the above design, with the possible addition of gold cording, or lengths of wicker woven between the gaps in the reeds to add further interest.